*This posting contains advertising.
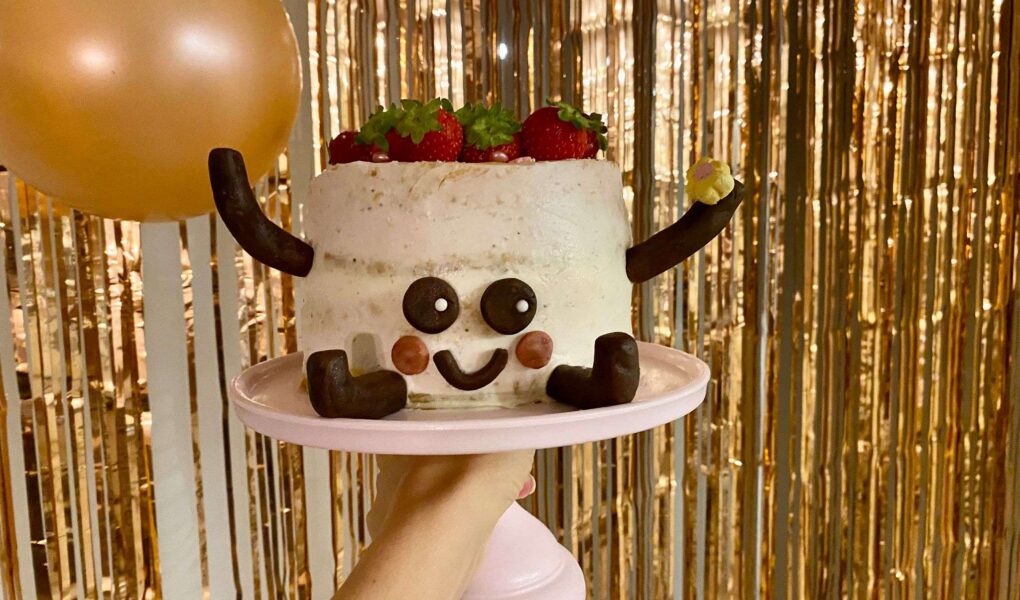
Are you looking for a special strawberry birthday cake that not only tastes delicious but also looks incredibly cute? Then our Kawaii Strawberry Cake might be just the birthday cake you’re looking for!
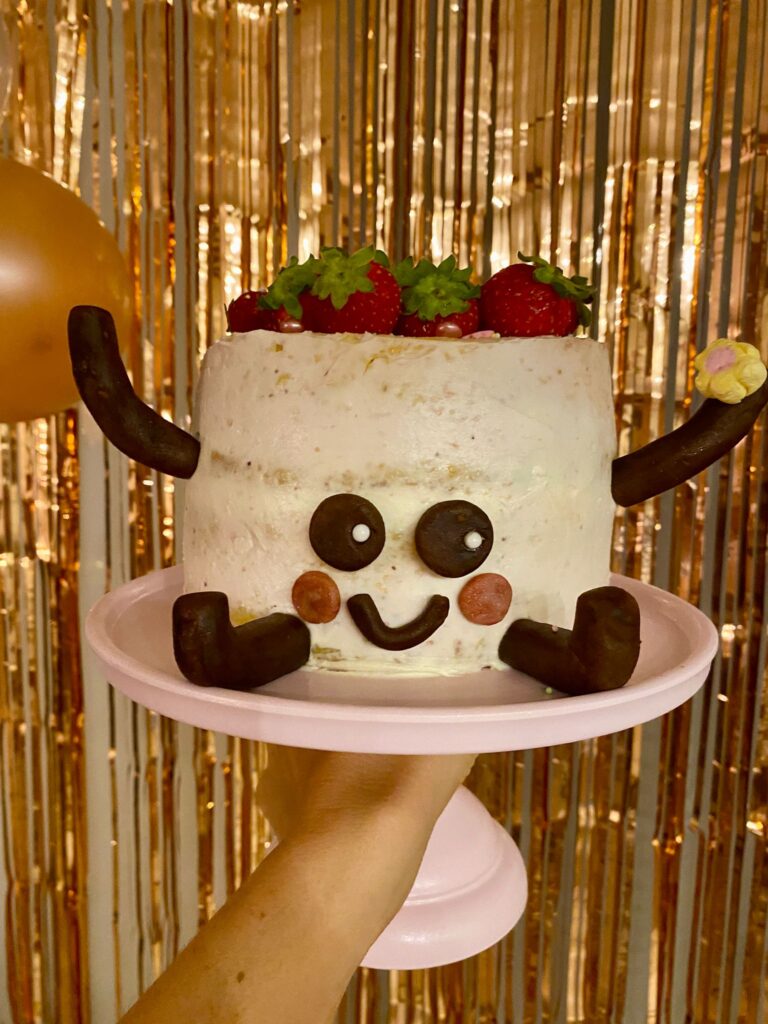
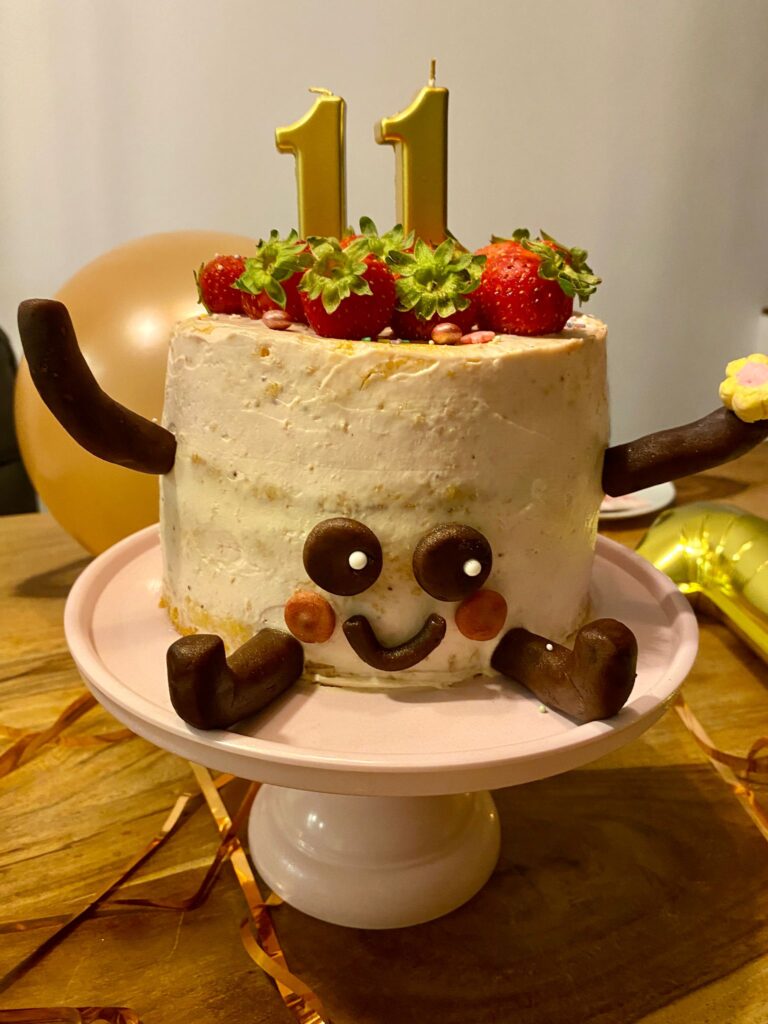
This adorable strawberry cake combines fluffy vanilla sponge cake with a fruity, creamy filling made with strawberries, mascarpone and whipped cream. Fresh strawberries, a cute little face and tiny arms and legs made from marzipan turn it into an adorable Kawaii cake – perfect for birthdays and for strawberry fans of all ages.
What Does Kawaii Mean?
Have you heard of the Kawaii trend?
“Kawaii” comes from Japan and roughly translates as “cute” or “adorable.” The Kawaii style is known for simple, incredibly sweet-looking faces with big eyes, tiny mouths and rosy cheeks. Even everyday foods and ordinary objects suddenly seem to have their own adorable personalities.
My Minis absolutely love little cuddly toys and decorations with these cute faces. And since one of my Minis is a huge Kawaii fan, I knew exactly what kind of cake I wanted to make for her birthday: a Kawaii birthday cake!
To match the theme, I turned the cake into a little character with a face, arms and legs. Fun fact: My Mini thought it was a marshmallow!
And I can already tell you: the birthday morning surprise was a success!
Our Kawaii Strawberry Birthday Cake
Underneath the adorable decoration, this birthday cake hides a wonderfully fruity strawberry cake with mascarpone and whipped cream.
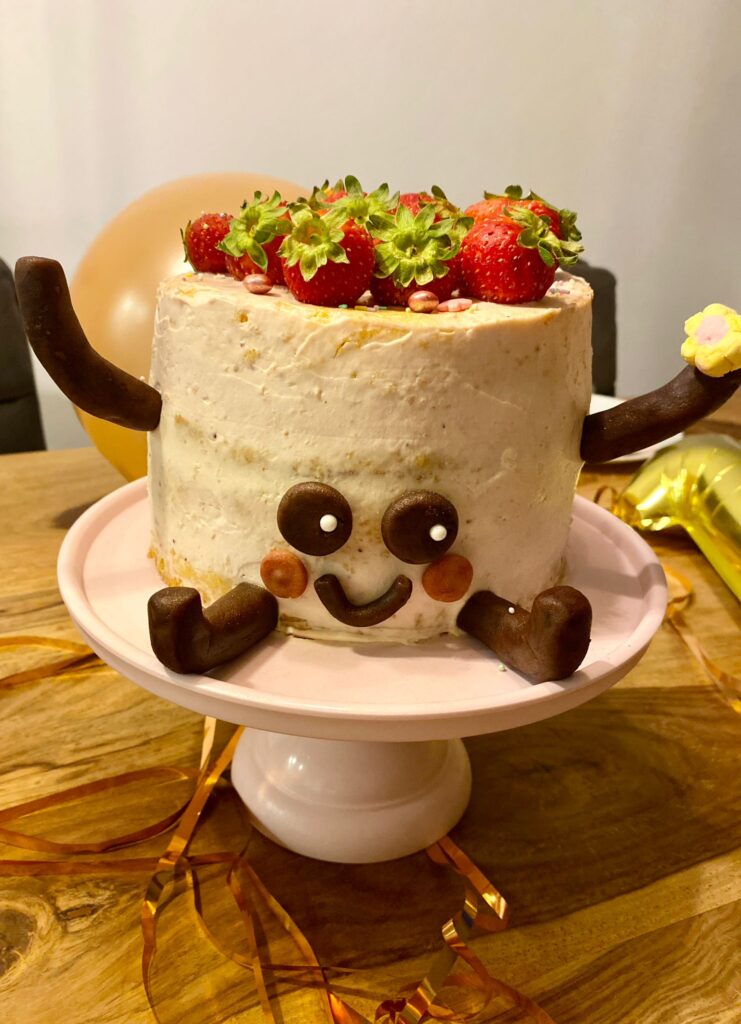
The cake consists of four layers of vanilla sponge filled with a creamy strawberry mascarpone filling. The outside is then covered with the remaining strawberry cream and decorated with fresh strawberries.
The Kawaii face, arms and legs are made from marzipan.
The result is a fruity yet playful birthday cake for kids that is guaranteed to stand out on any birthday table.
Can You Make This Strawberry Cake with Kids?
Of course you can make this strawberry cake together with your Minis! However, I would allow a little more time for the complete cake than you would for a simple loaf cake or muffins.
That’s why I particularly recommend making the entire cake together with older children from around the age of eight.
The great thing about a layer cake, though, is that you can easily divide the preparation into several smaller tasks.
Younger Minis can therefore join in too. They can stir the batter, weigh ingredients, arrange strawberries on the finished cake or shape the cute marzipan pieces for the Kawaii face.
I actually made this particular strawberry cake without my Minis. Birthday cakes are a little family tradition in our house: the birthday child is surprised with their cake on the morning of their birthday.
That means birthday cakes are one of the few things I bake secretly and without the help of my Minis.
Recipe for Our Kawaii Strawberry Cake
For our strawberry cake, we need two 20 cm / 8-inch vanilla sponge cakes. Each sponge is later cut horizontally in half, giving us four cake layers in total.
Between the layers goes our fruity strawberry cream.
Ingredients
Vanilla Sponge Cake (20 cm / 8-inch springform pan)
The following quantities make one 20 cm / 8-inch sponge cake. You need two sponge cakes for the Kawaii Strawberry Cake, so you’ll need to make this recipe twice.
- 4 eggs
- 100 g sugar
- 1 pinch of salt
- 100 g flour
- 1 teaspoon vanilla extract
My tip: If you have two 20 cm / 8-inch springform pans, you can bake both sponge cakes at the same time. Otherwise, simply bake them one after the other.
Strawberry Mascarpone Cream
- 400 ml whipping cream
- 4 packets vanilla sugar
- 2 packets cream stabilizer
- 500 g mascarpone
- 150 g strawberry purée, fresh or frozen I always freeze some of the strawberries we pick during the summer and defrost them whenever I need strawberry purée.
Ingredients for the Kawaii Decoration
- 250 g fresh strawberries
- 100 g marzipan
- Baking cocoa
- pink food coloring* or pink edible shimmer powder
- sugar pearls
- edible glitter spray*
(*The links marked with an asterisk (*) are affiliate links. I can recommend suitable products that do not cost you more and I receive a small commission that helps me finance my blog. Thank you!)
Discount code for your purchase at GoodBake: With the discount code “LIA12” you save 12% on your purchase from Goodbake.
Baking accessories
Kitchen scales, mixing bowl, tall mixing bowl, 20 cm / 8-inch springform pan, hand mixer, fine-mesh sieve, whisk, spatula, cooling rack, serrated knife, tablespoon, small cake stand or cake board, cake ring, cake scraper and 6 toothpicks.
Do you like the pretty pink cake stand?
I’m often asked about our pretty pedestal cake stand. The pink cake stand is perfect for small 20 cm / 8-inch cakes. Unfortunately, I haven’t been able to find our exact model online anymore, but I’ve put together some similar options for you..
(*The links marked with an asterisk (*) are affiliate links. I can recommend suitable products that do not cost you more and I receive a small commission that helps me finance my blog. Thank you!)
Preparation
Vanilla Sponge Cake
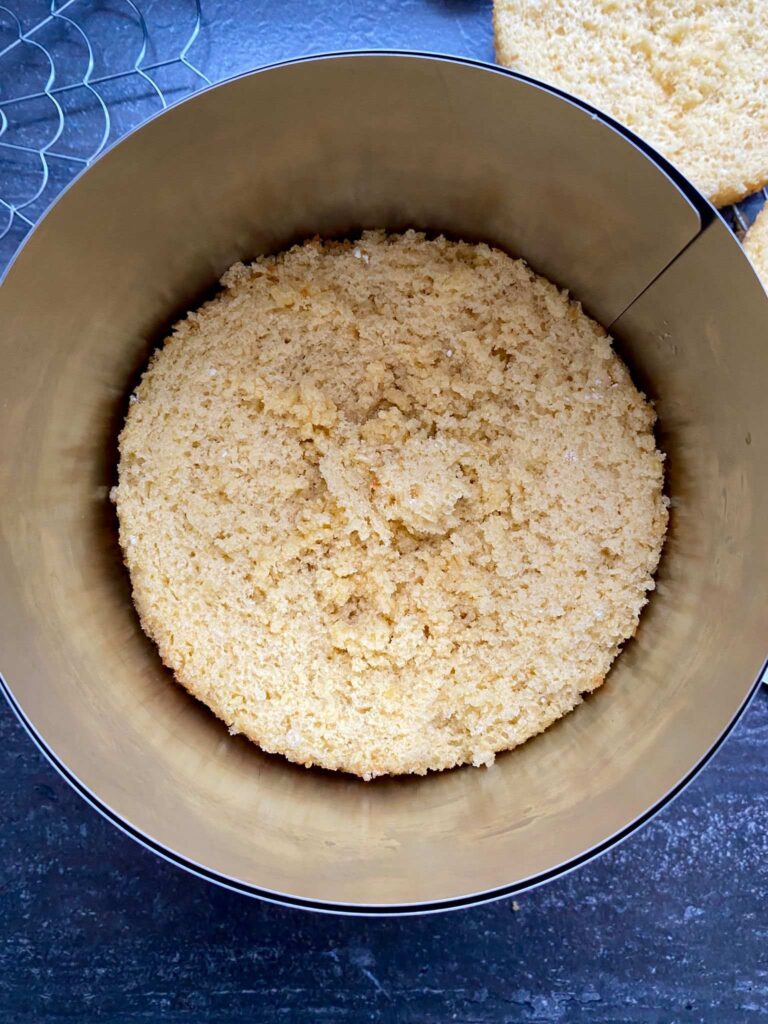
For this recipe, we need two vanilla sponge cakes. You can bake them one after another or, if you have two 20 cm / 8-inch cake pans, bake them at the same time.
- Preheat the oven to 180°C top/bottom heat.
- Crack the eggs into a mixing bowl and add the sugar and vanilla extract.
- Beat with a mixer for at least 10 minutes, until the egg and sugar mixture is pale and very fluffy.
- Sift the flour and salt into the egg mixture.
- Using a whisk, carefully fold the dry ingredients into the mixture, working from the outside towards the center. Try to retain as much air in the batter as possible.
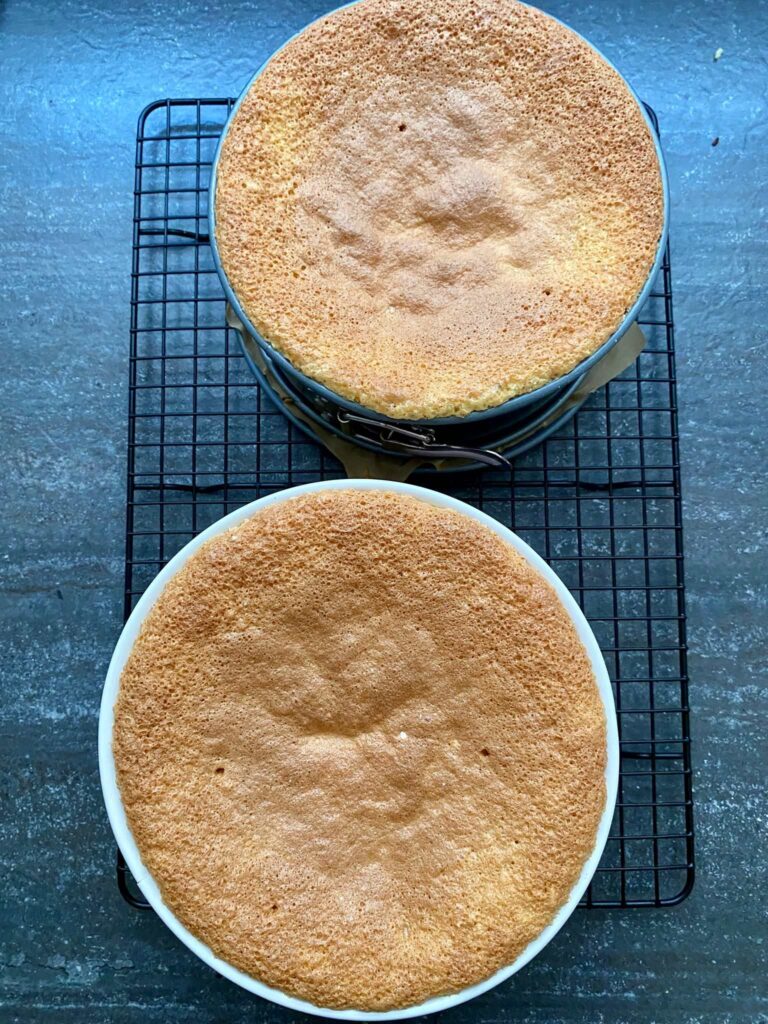
- Pour the batter into a springform pan lined with baking parchment. Do not grease the sides of the pan, as this can prevent the sponge from rising properly. Carefully smooth the surface.
- Immediately place the sponge in the preheated oven and bake for approximately 30 minutes. Towards the end of the baking time, insert a skewer into the center to check whether the cake is done.
- Once baked, remove the cake from the oven and allow it to cool in the pan for about 5 minutes. Carefully run a knife around the edge to loosen it. Place a cooling rack over the cake, turn it over and carefully remove the base of the springform pan.
- Allow the sponge cake to cool completely.
My Tip for a Light and Fluffy Sponge Cake
Two things are particularly important if you want a beautifully light sponge:
- Beat the egg and sugar mixture for plenty of time and fold in the flour very gently.
- The less air you knock out of the mixture, the lighter and fluffier your sponge will be.
Make the Strawberry Mascarpone Cream
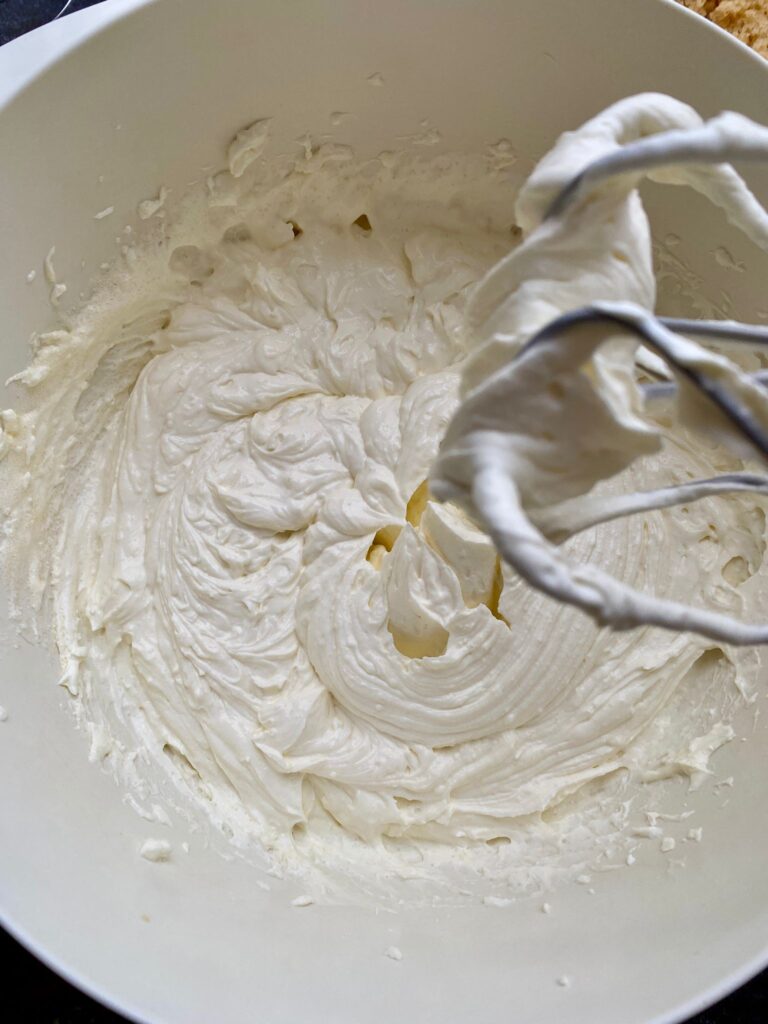
- Place the whipping cream, vanilla sugar and cream stabilizer in a tall mixing bowl and whip until firm.
- Put the mascarpone into a separate mixing bowl and briefly beat until smooth.
- Add the whipped cream and strawberry purée to the mascarpone and mix briefly until you have a smooth cream.
Assemble the Strawberry Cake
- Using a serrated knife – a bread knife works wonderfully – cut both sponge cakes horizontally in half so that you have four cake layers in total.
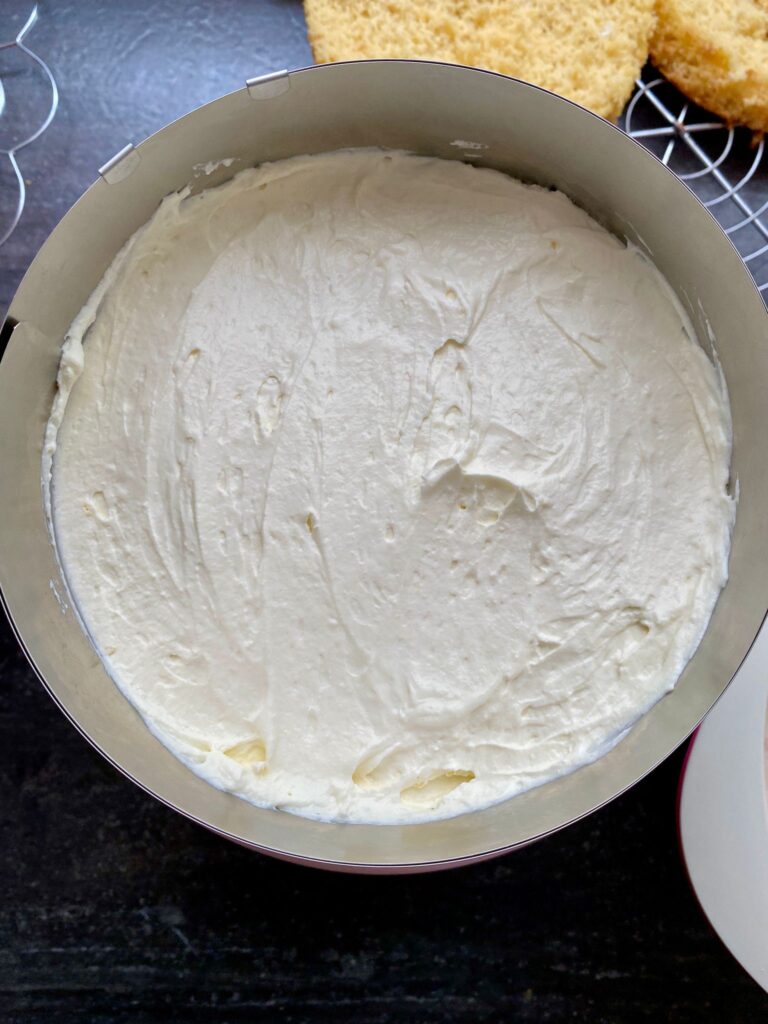
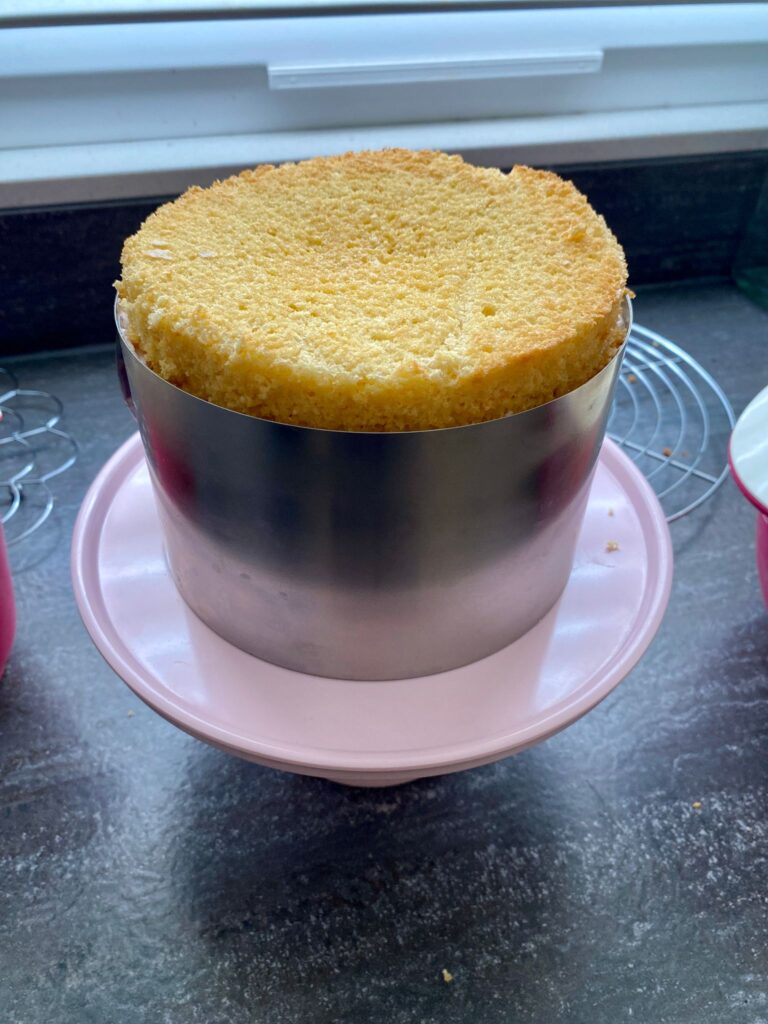
- Place the first layer onto a small cake board or cake stand and position a cake ring around it.
- Spread ¼ of the strawberry cream evenly over the sponge.
- Carefully place the second cake layer on top.
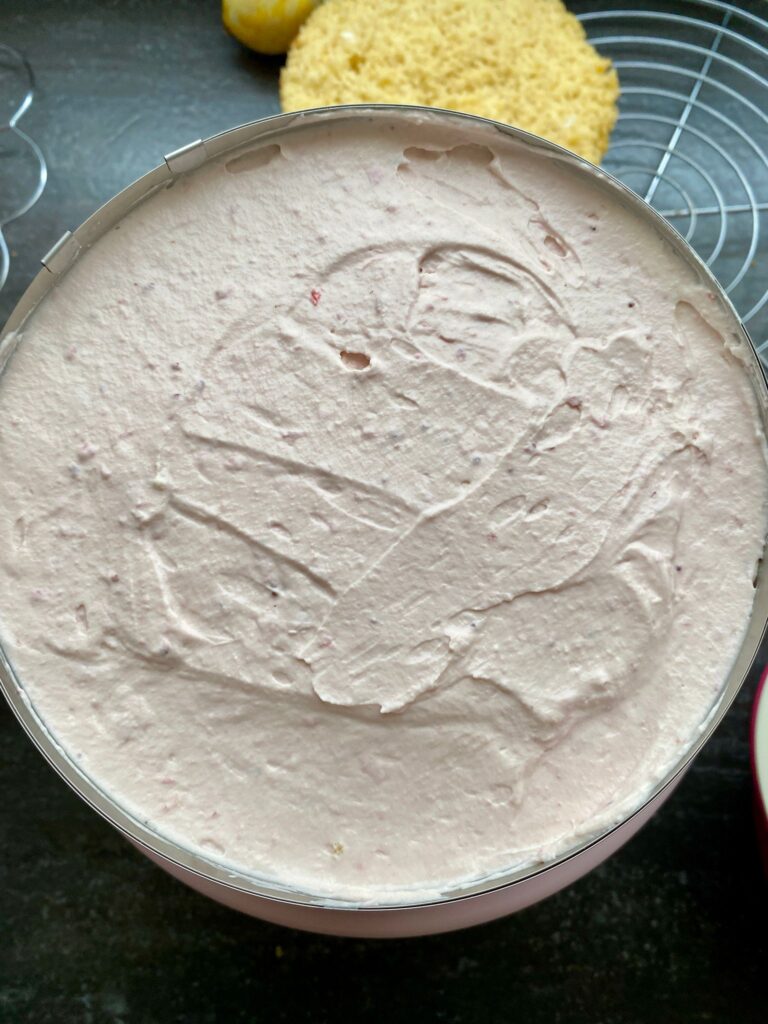
- Repeat the process until you have used three layers of filling.
- Finish with the fourth sponge layer and place the cake in the refrigerator for one hour. You should still have around ¼ of the strawberry cream left. Keep this in the refrigerator too.
- While the strawberry cake is chilling, you can prepare the marzipan decorations.
Make the Kawaii Decorations
Now it’s time to create the arms, legs and face for your little strawberry cake.
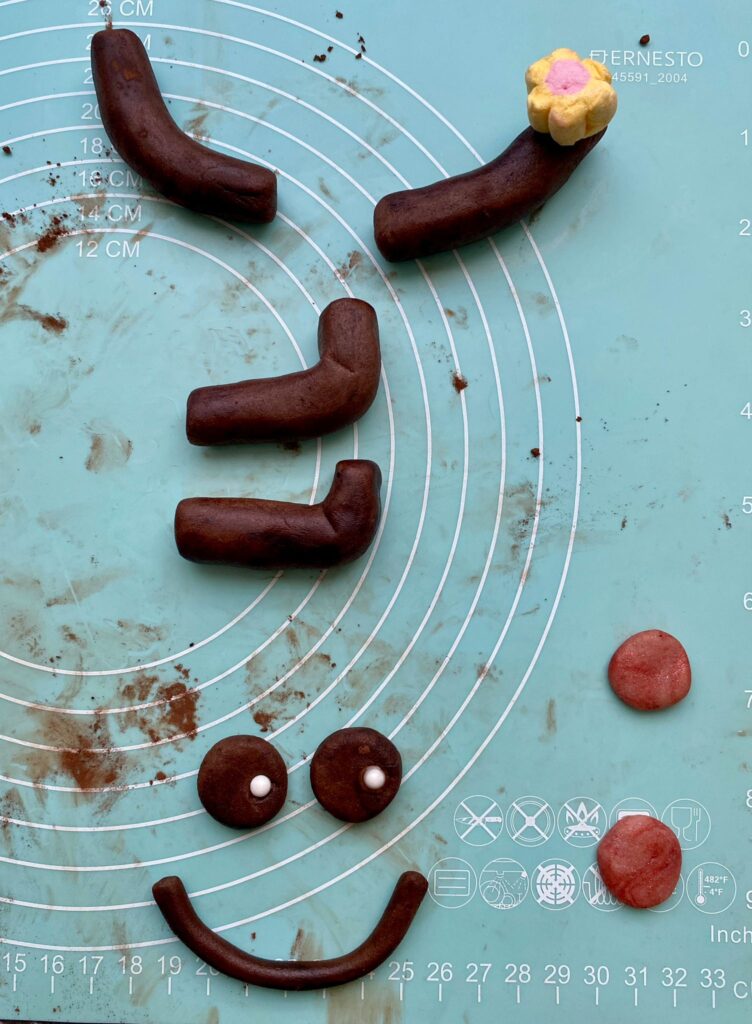
- To make the decorations stand out against the pale cake, color most of the marzipan brown with cocoa powder. Knead approximately 90 g marzipan with 10 g cocoa powder until evenly colored.
- Knead the remaining 10 g marzipan with a drop of pink food coloring or red shimmer powder to make the rosy cheeks.
- Divide the brown marzipan into five equal pieces. Roll four of them into small sausage shapes – these will become the cake’s arms and legs. To attach them more easily, I inserted a toothpick halfway into the end of each piece. Use the fifth piece to make two eyes and a mouth. I used white sugar pearls for the pupils, but you could also use a little uncolored marzipan.
- Shape the pink marzipan into two small balls and flatten them to create the cheeks.
Important: If children will be eating the cake, make sure everyone knows which decorations contain toothpicks and remove all toothpicks completely before eating.
The Final Step: Decorating Our Kawaii Strawberry Cake
- Once the strawberry cake has chilled for an hour, carefully remove the cake ring. It helps to run a long knife gently around the inside edge first.
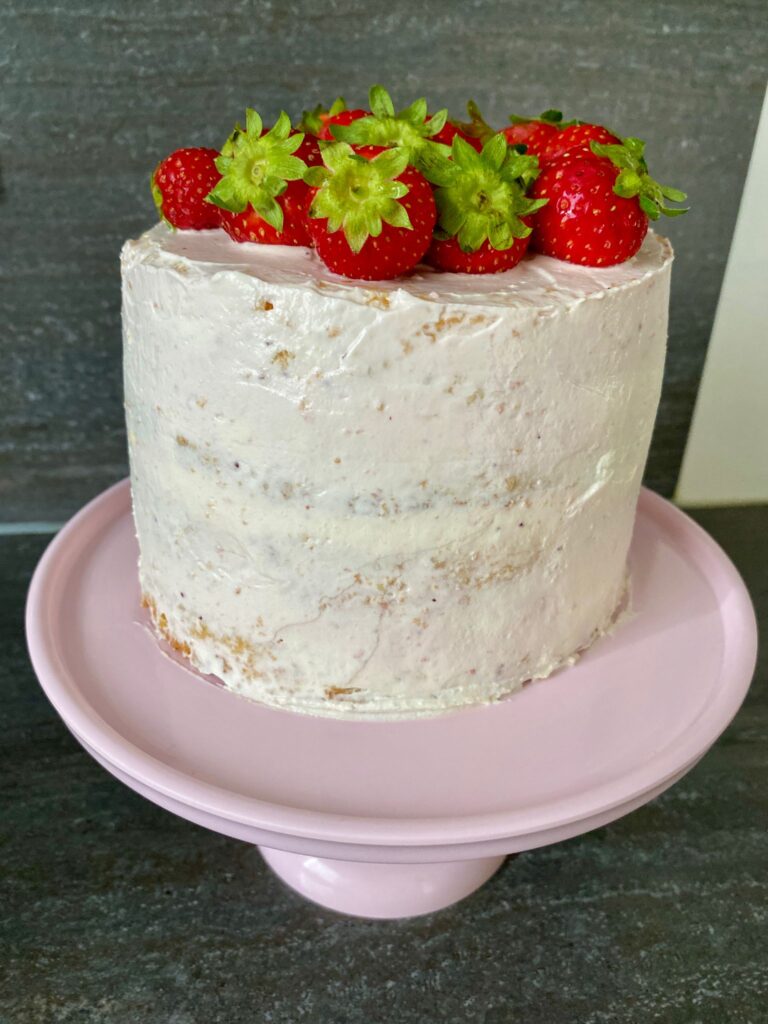
- Use the remaining strawberry cream to cover the top and sides of the cake. Smooth it with a cake scraper. Don’t worry if it isn’t perfectly smooth – this step can take a little patience, and perfection really isn’t necessary!
- Finally, arrange the fresh strawberries on top. Carefully add the face and attach the arms and legs to the sides of the cake. I recommend adding the arms shortly before serving because marzipan is softer than fondant and the little arms may otherwise lose their shape.
Preparation in pictures


Can I Make the Strawberry Cake Ahead of Time?
Yes! Especially when it comes to birthday cakes, I think being able to prepare things in advance is incredibly helpful.
You definitely don’t need to bake and decorate the entire cake on the birthday itself. For example, you can bake the sponge cakes the day before and let them cool completely. You can also prepare the marzipan decorations ahead of time and store them carefully. Then prepare the strawberry cream, assemble the cake and leave it to chill in the refrigerator. I recommend adding the fresh strawberries and the more delicate marzipan decorations closer to serving time. That way, there’s much less to do on the actual birthday.
Variations for Your Kawaii Birthday Cake
You can easily adapt the basic idea of this cake to suit the birthday child’s favorite flavors and style.
- Even more strawberries: Add finely chopped fresh strawberries between the individual cake layers.
- Try other berries: Depending on the season, you can replace the strawberries with raspberries or a mixed berry purée.
- Create different Kawaii faces: This is where you can really get creative. Change the eyes, mouth or cheeks and give your little cake its very own personality.
- Skip the arms and legs: If you want a quicker version, a cute face on the front of the cake is enough to create that typical Kawaii look.
Our Baking Verdict
I love birthday cakes that don’t just look beautiful but taste really delicious too.
Our Kawaii Strawberry Cake combines fluffy vanilla sponge with fruity strawberry mascarpone cream and fresh strawberries. The adorable Kawaii face transforms a classic strawberry layer cake into a truly special birthday cake.
Admittedly, this recipe takes a little more time than our easy muffins or simple cakes. But the individual steps can easily be divided up and prepared in advance. And when the birthday child finally discovers their adorable little strawberry cake with its own face, all that effort is definitely worth it!
My Minis and I hope you have lots of fun baking and decorating your own Kawaii Strawberry Cake!
Yours, Lia
BAKING NEWS – The most delicious thing right in your inbox?
Sign up for our newsletter and be the first to hear about colorful recipe ideas, easy baking hacks and upcoming baking promotions!
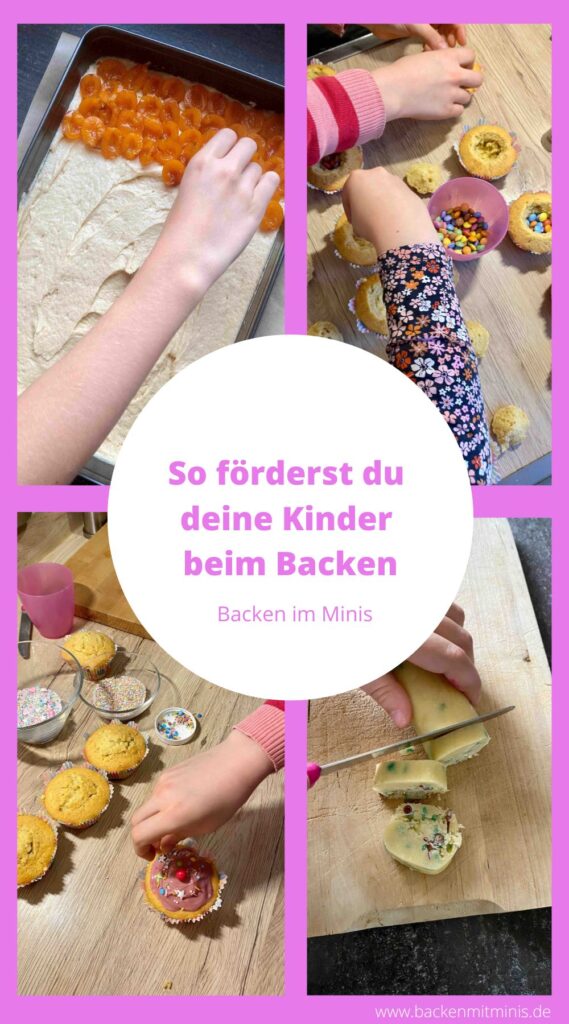
How to encourage your children to bake
Baking with children is much more than just a delicious treat that can be enjoyed together!
By baking with your child, you'll teach them many valuable things! Learn more about this in my blog post: How to encourage your children to bake!
To make baking a wonderful, shared experience for you and your little ones, you'll find tips for stress-free baking in the following blog posts:
- My tips for baking with children
- Baking tasks for children aged 2 and over
- Safety when baking with children
- Q & A about baking
Have fun baking! Yours Lia!
Have you baked the recipe?
How exciting! We're really happy about that! We are pleased that we were able to delight you with our recipe. Feel free to share your treat with us on Instagram using the hashtag #backenmitminis.
 English
  German