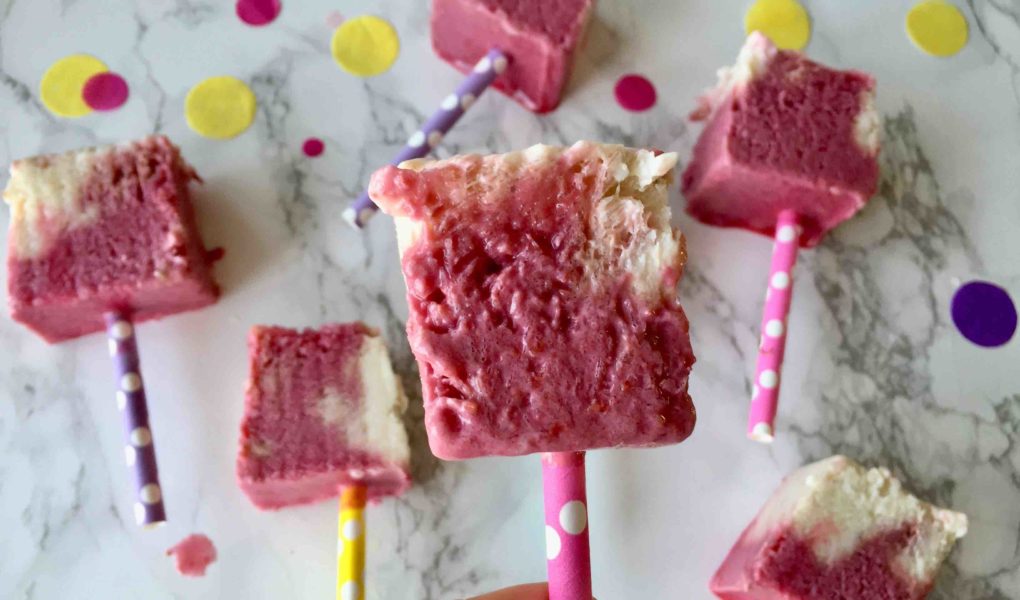
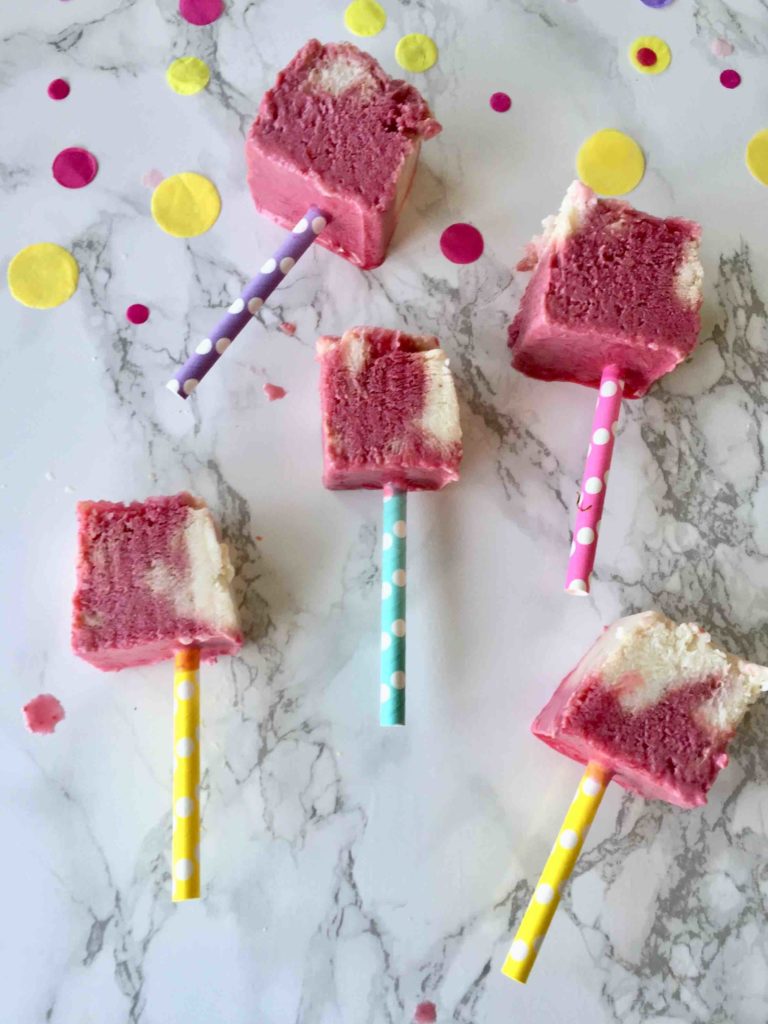
Ice pops are the perfect summer refreshment! But how can you make these juicy KiBa (cherry-banana) ice pops without a mold? Today, we’ll show you our little trick!
My Minis and I love cake… and ice cream! Especially in summer, fruity ice pops in all shapes and colors are our favorite treat (the Raspberry-Vanilla Ice Pops are our current highlight). Usually, we use cakesicle molds or classic ice pop molds—they come in so many beautiful shapes!
But when we recently visited Grandma, we were craving ice pops but had no molds with us. And since skipping ice pops was not an option 😉, we tried a little trick and made ice pops without any molds!
Making Ice Pops without Molds
The first thing that comes to mind when making ice pops without molds is the “yogurt cup method.” Empty yogurt cups—preferably the small children’s ones—are filled with juice, purée, or something similar, then fitted with a stick and placed in the freezer. The only downside? Not everyone saves yogurt cups at home.
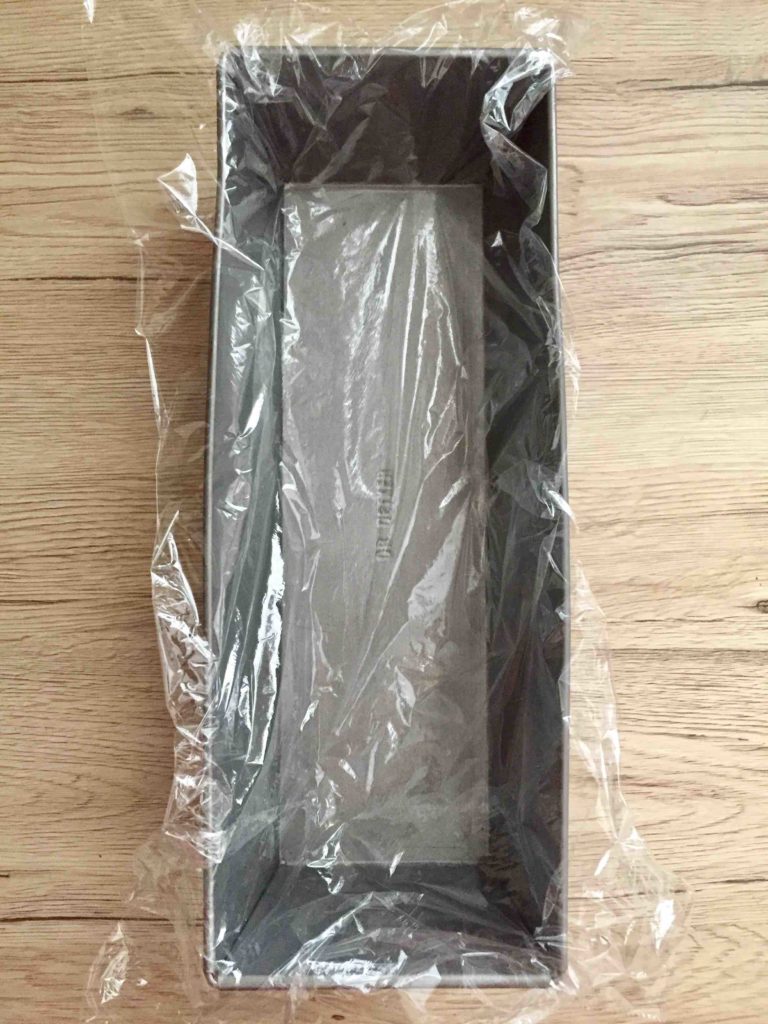
But almost every kitchen has a loaf pan! And that’s exactly what we’ll use today to make our juicy KiBa ice pops. If you don’t have a loaf pan, you can also use a Tupperware container.
The big advantage of making ice pops in a loaf pan is that you can prepare several at once. Perfect for a child’s birthday party, a summer activity with a preschool group, or simply for stocking up your freezer at home.
Recipe for Juicy KiBa Ice Pops
Making ice pops is a wonderful activity with kids. They can help with puréeing and filling the loaf pan, which is also a great way to practice fine motor skills. And of course, it’s okay if things get a little messy. 😉
Ingredients for 16 KiBa Ice Pops
Ice Mixture
- 1 large jar of cherries
- 5 ripe bananas
- Greek yogurt (at least 10% fat – the lower the fat, the icier the texture once frozen)
Baking Accesories
Sieve, Tall container for blending, Hand blender or mixer, Rubber spatula, Sharp kitchen knife, Loaf pan, 16 wooden sticks* (mini tip: du kannst auch or cut colorful paper straws* in half – though they aren’t as sturdy as wooden sticks), Aluminum foil, Plastic wrap, Scissors, Cutting board, Bread knife
Preparation
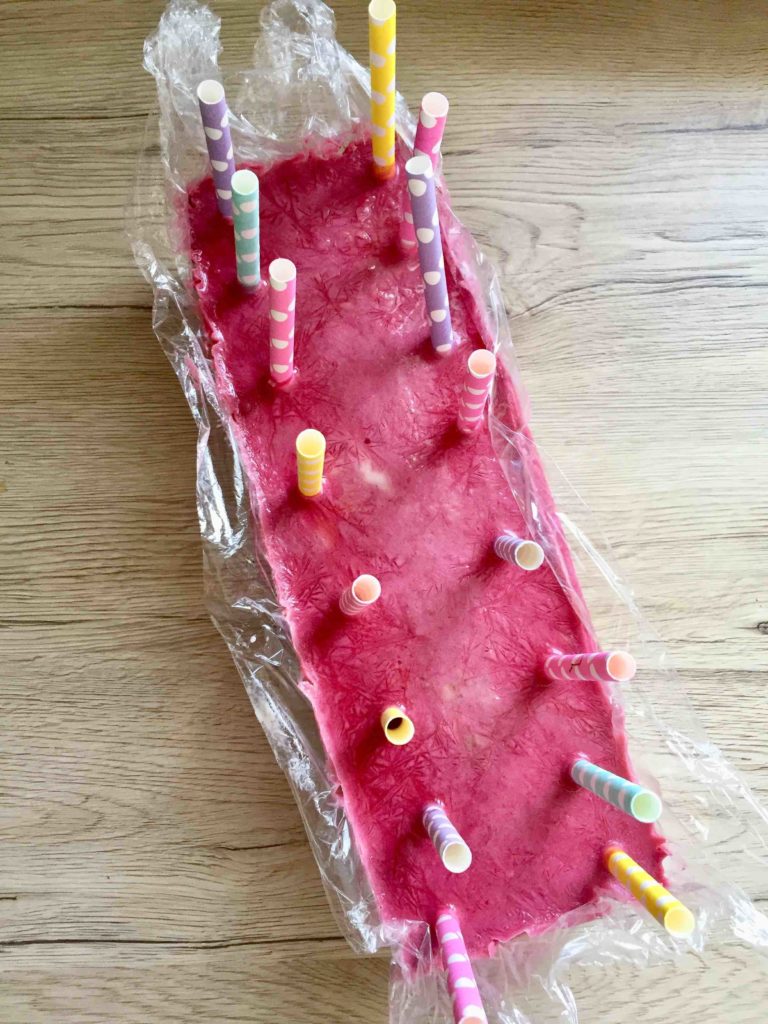
- Line the loaf pan with plastic wrap.
- Peel the bananas and blend them with half the yogurt.
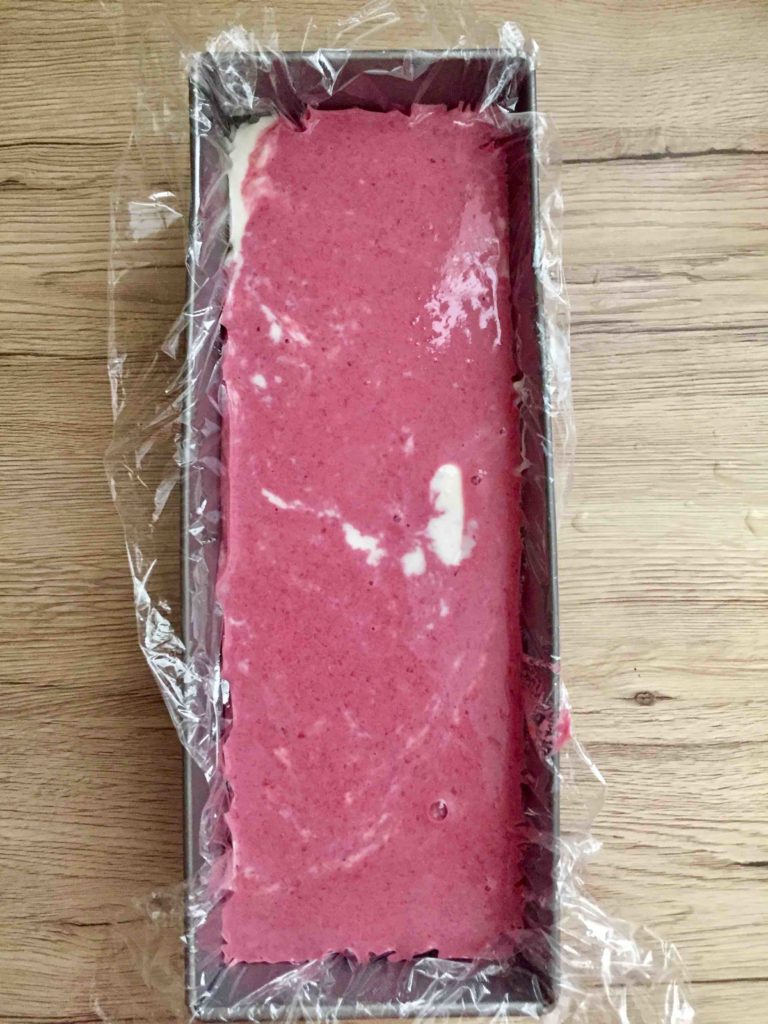
- Pour the banana-yogurt mixture into the loaf pan.
- Drain the cherries through a sieve.
- Purée the cherries, add the remaining yogurt, and blend.
- Carefully pour the cherry-yogurt mixture on top of the banana base.
- Cover the loaf pan with aluminum foil.
- Use a sharp knife to cut small slits in the foil, in two parallel rows, for the sticks.
- Insert the sticks (or straw halves) into the slits.
- Place the loaf pan in the freezer for at least 5 hours (overnight is best).
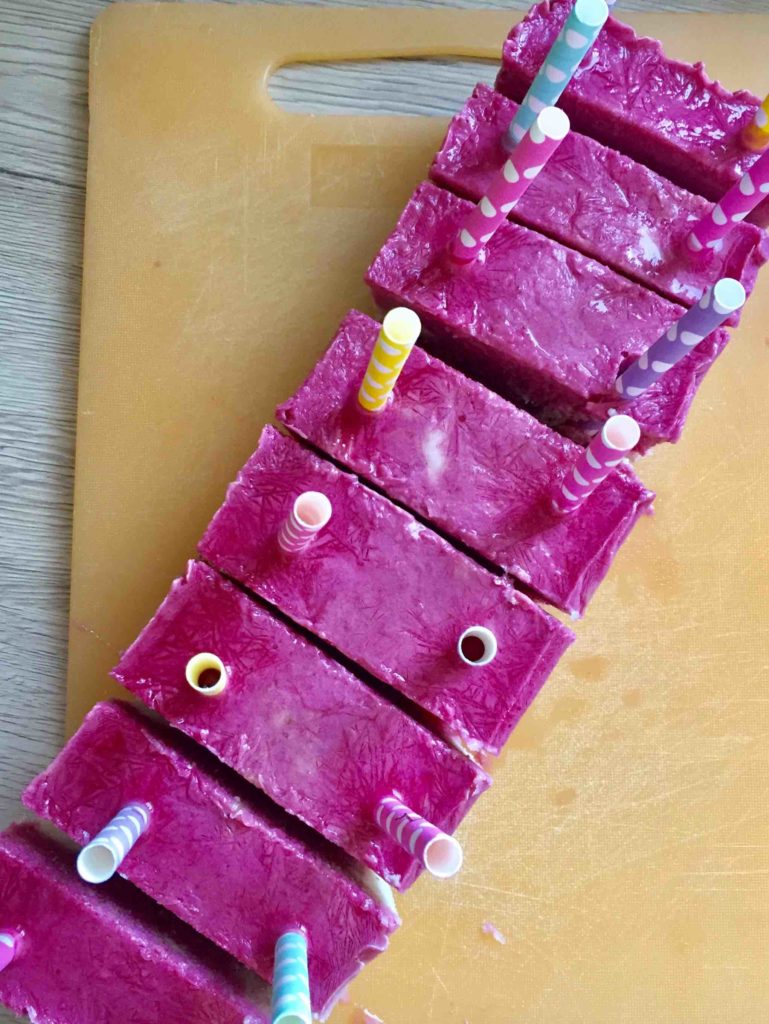
- Once frozen, lift the block out of the pan using the plastic wrap and peel it off.
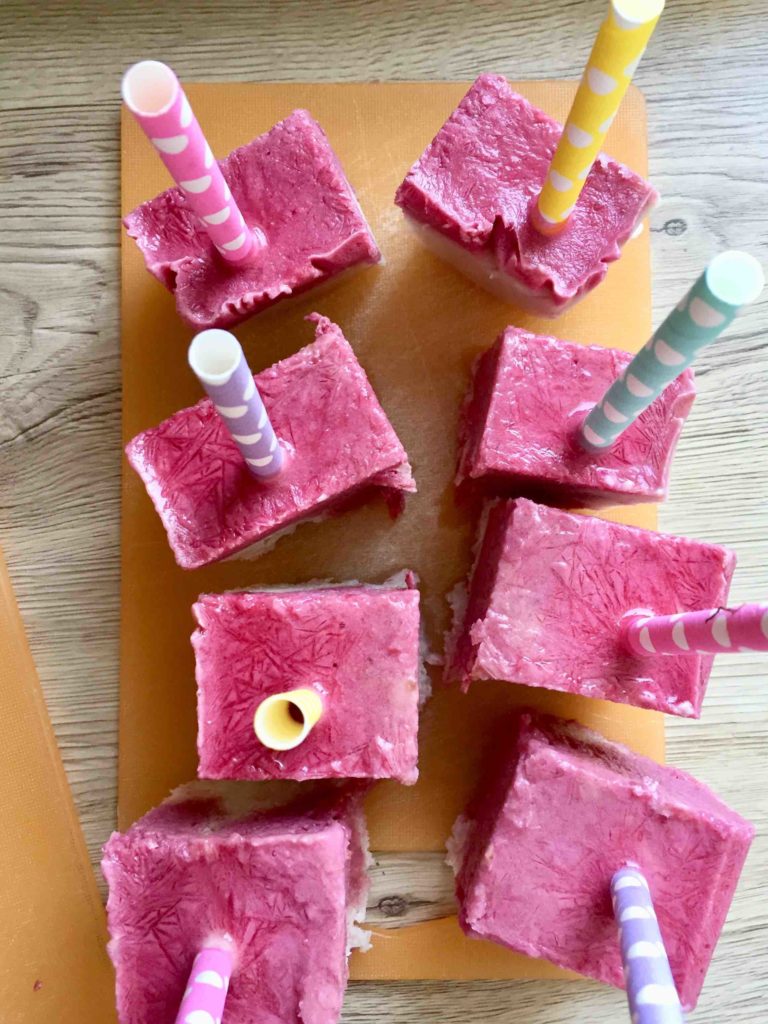
- Slice the frozen block into pieces, then cut each slice in half to make individual ice pops.
Preparation in pictures

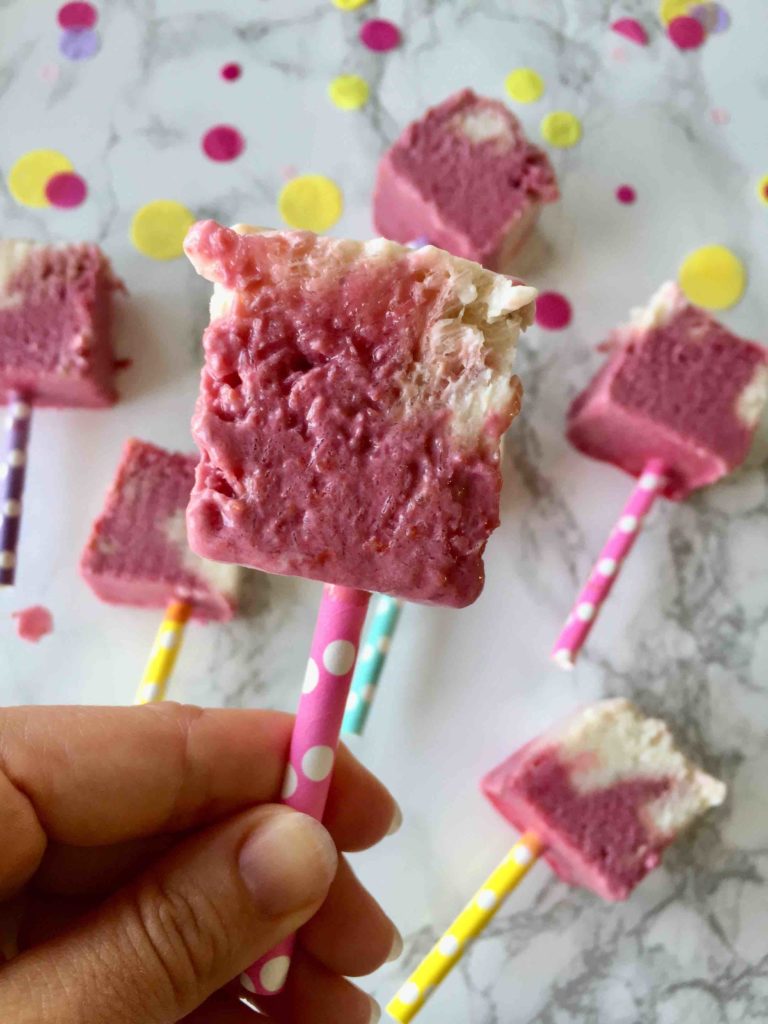
And just like that, you’ve got the perfect homemade refreshment for hot summer days! If you don’t eat them all at once, check out our tips for storing homemade ice pops.
My Minis & I wish you and your little ones lots of fun making (and eating!) these juicy KiBa ice pops!
Yours, Lia
Have you baked the recipe?
How exciting! We're really happy about that! We are pleased that we were able to delight you with our recipe. Feel free to share your treat with us on Instagram using the hashtag #backenmitminis.
BAKING NEWS – The most delicious thing right in your inbox?
Sign up for our newsletter and be the first to hear about colorful recipe ideas, easy baking hacks and upcoming baking promotions!