*This posting contains advertising
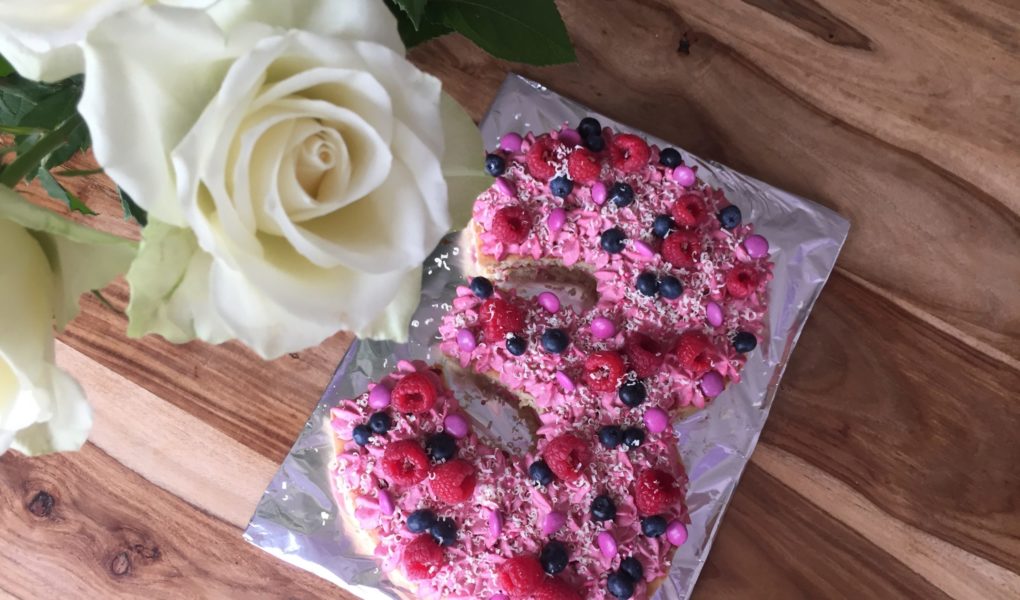
child's birthday! Since my "Mini" loves raspberries, there is a berry number cake in bright pink for her 3rd birthday. These beautiful trend-cakes are not only a visual highlight but also a hit in terms of taste.
Although I am sure that any purple-pink cake with Smarties would have caused excitement for a three-year-old, this Number Cake is something very special. Happy Birthday, my sweetheart!
The Recipe: Berry Number Cake
This cake consists of a fluffy sponge cake and a stable raspberry-quark filling. The recipe is designed for one number (two layers).

Ingredients for the sponge cake
- 6 eggs
- 150 g sugar
- 2 tbsp vanilla sugar
- 120 g flour
- 120 g cornstarch
- 1 tsp baking powder
Ingredients for the berry filling and decoration
- Raspberry jam
- 400 g heavy cream
- 4 tsp San Apart (cream stabilizer)
- 200 g Quark (or Greek yogurt/cream cheese as a substitute)
- 200 g raspberries (frozen or fresh)
- 2 tsp Agar Agar
- 80g powdered sugar
- juice of half a lemon
- Pink Smarties
- White chocolate shavings
- Fresh raspberries and blueberries
... let your imagination run wild
Baking accessories Mixer, mixing bowl, baking sheet, parchment paper, possibly a paper stencil, kitchen knife, pot.
Preparing the Number Cake
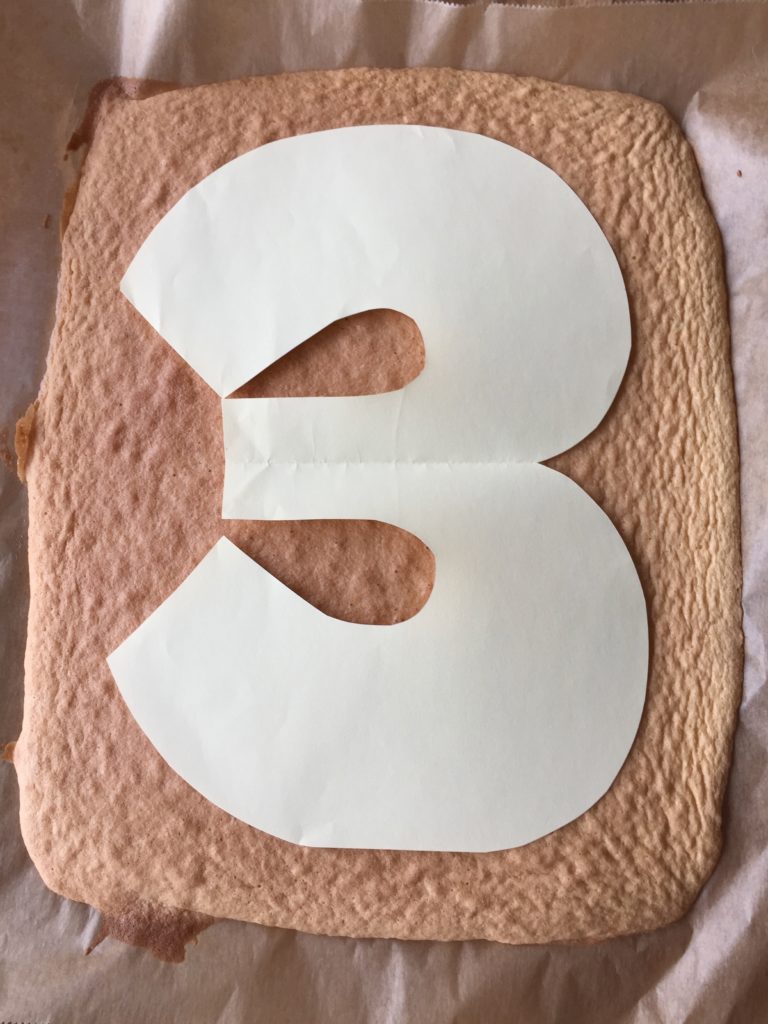
1. Preparing the sponge layers as a base
- For the sponge layers, whisk the eggs with the sugar (including vanilla sugar) until white and creamy.
- Then, sift the flour, starch, and baking powder and fold them into the egg mixture.
- Spread half of the batter on the baking sheet lined with parchment paper and bake at 175 °C (top and bottom heat) for about 20 minutes. To make sure the cake is baked through, please do a toothpick test.
- Let the cake cool down.
- Repeat the same with the second half—for the second layer.
2. Creating the fruity raspberry filling
While the sponge layers are cooling, you can finish the filling:
- For the filling, puree the raspberries. For a smoother result, you can also strain them through a sieve.
- To give the cream more stability later, mix the raspberry puree with 2 tsp Agar Agar in a pot and let it boil for 2 minutes.
- While the raspberry mixture cools down slightly, stir the quark with the powdered sugar.
- Then, whip the cream with 4 tsp San Apart until stiff. Now, mix the quark and the cream together and fold in the slightly cooled raspberry mixture.
- Let the mixture chill in the refrigerator afterwards.
3. The Finale: Assembling and Decorating
Finally, you assemble all the individual parts of the Number Cake. The birthday cake is created:
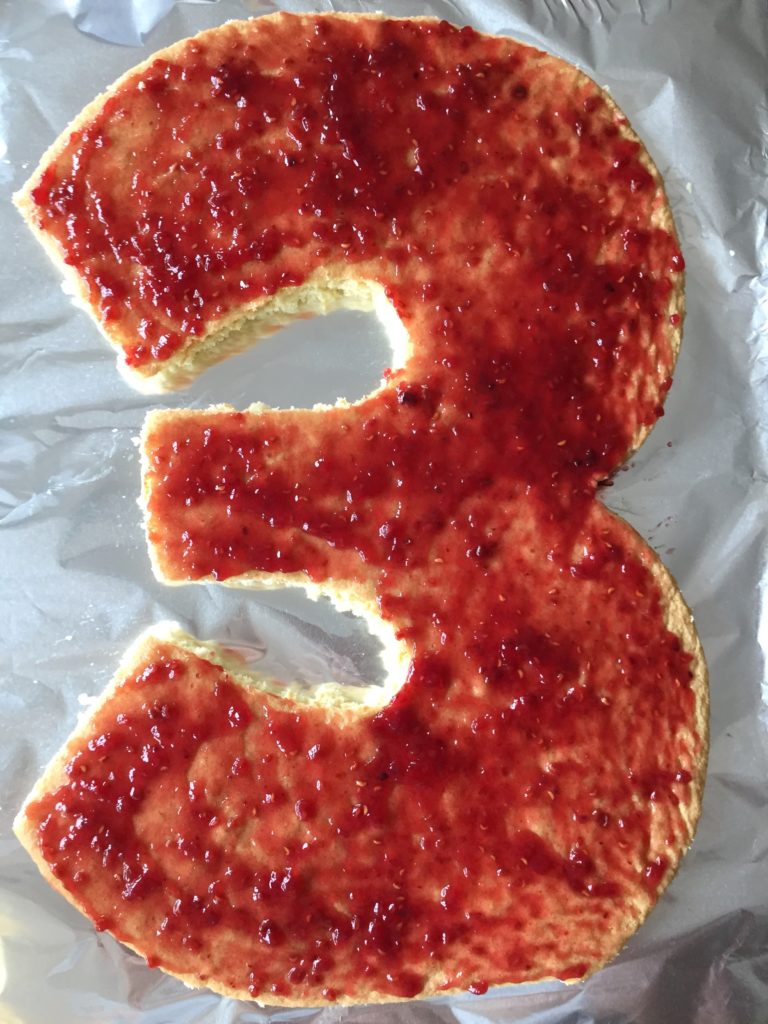
- For the Number Cake, the number is now cut out of both sponge layers. For this, it is helpful to pre-draw the number on a stencil, place it on the cake, and cut it out using a knife.
- Now, spread raspberry jam on the layers.
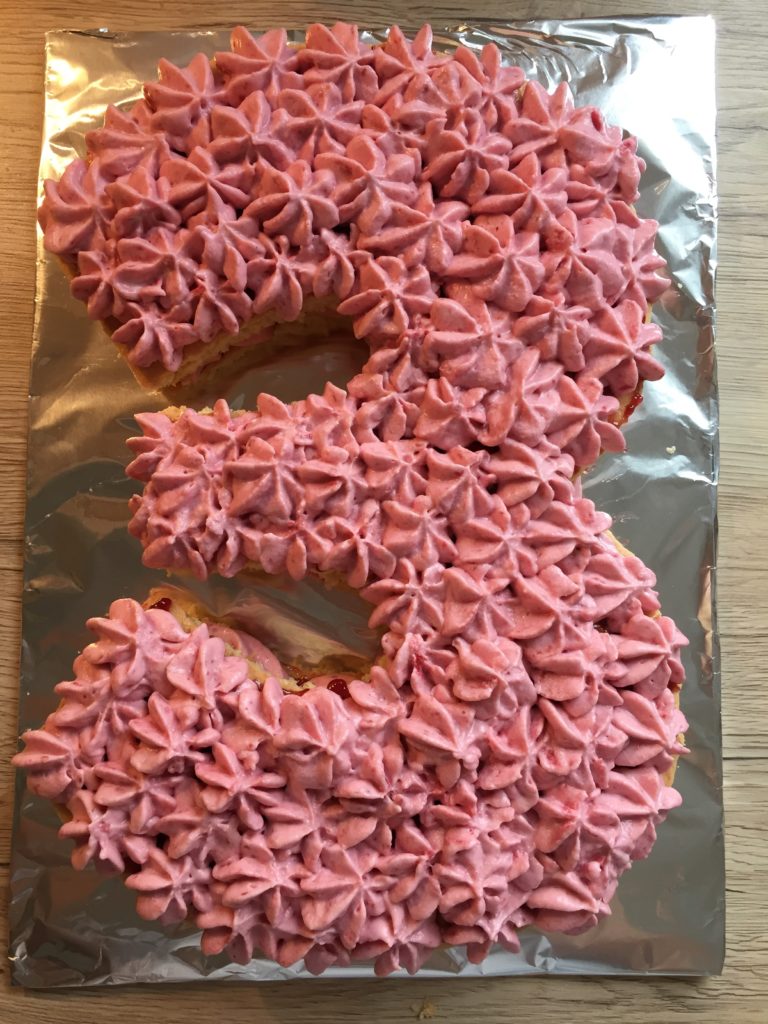
- Next, fill a piping bag with the raspberry mixture and pipe small dollops onto the first layer. Then, place the second layer on top of the first and decorate it with small cream-quark dollops as well.
- The number cake can now be decorated as desired.
Mini-Tip: The principle also works wonderfully as a Letter Cake for initials or names! You can decorate the Number Cake beautifully in all colors and, of course, for all themes (e.g., Mermaid Cake, ...).
Let your creativity run wild!
Have fun baking!
Yours, Lia
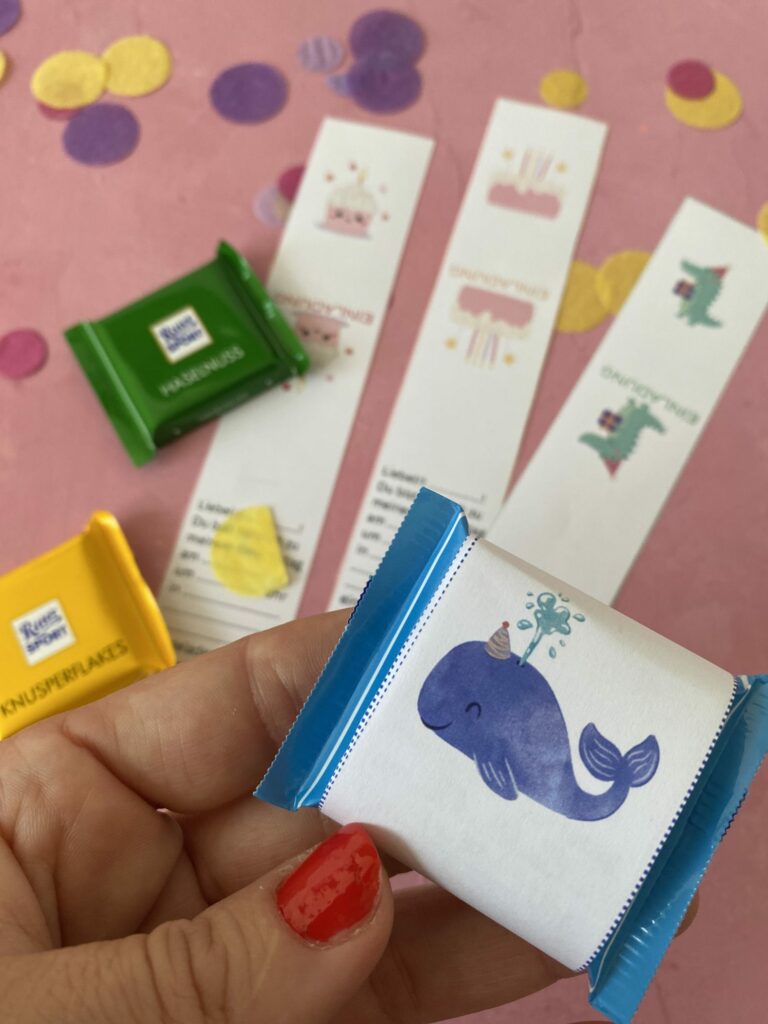
Chocolate children's birthday invitation
With our children's birthday banderoles for Ritter Sport Minis you can create a unique invitation for your child's birthday!
A lovingly designed banderole (if necessary with a preconceived invitation text) for parents with little time!
Have you baked the recipe?
How exciting! We're really happy about that! We are pleased that we were able to delight you with our recipe. Feel free to share your treat with us on Instagram using the hashtag #backenmitminis.
BAKING NEWS – The most delicious thing right in your inbox?
Sign up for our newsletter and be the first to hear about colorful recipe ideas, easy baking hacks and upcoming baking promotions!


Hallo, kann ich den Kuchen auch schon am vortag machen? Danke schon mal
Hallo Bianca,
ja, das kannst du. Obwohl ich das Dekorieren immer am aktuellen Tag machen würde. Falls der Kuchen bereits morgens zum Gratulieren benötigt wird, würde ich ihn auch abends fertig machen. Aber meine Regel ist immer so frisch wie möglich einstreichen und dekorieren.
Viel Spaß beim Nachbacken!
Kann man die Masse ein Tag vorher schonmal machen und in Kühlschrank stellen?
Hallo Sabrina,
ja, du kannst den Kuchen einen Tag vorher machen. Allerdings würde ich Dekoration wie frisches Obst und Streusel immer erst 1-2 Stunden vor Verzehr auf dem Kuchen dekorieren.
Delicious greetings,
Lia