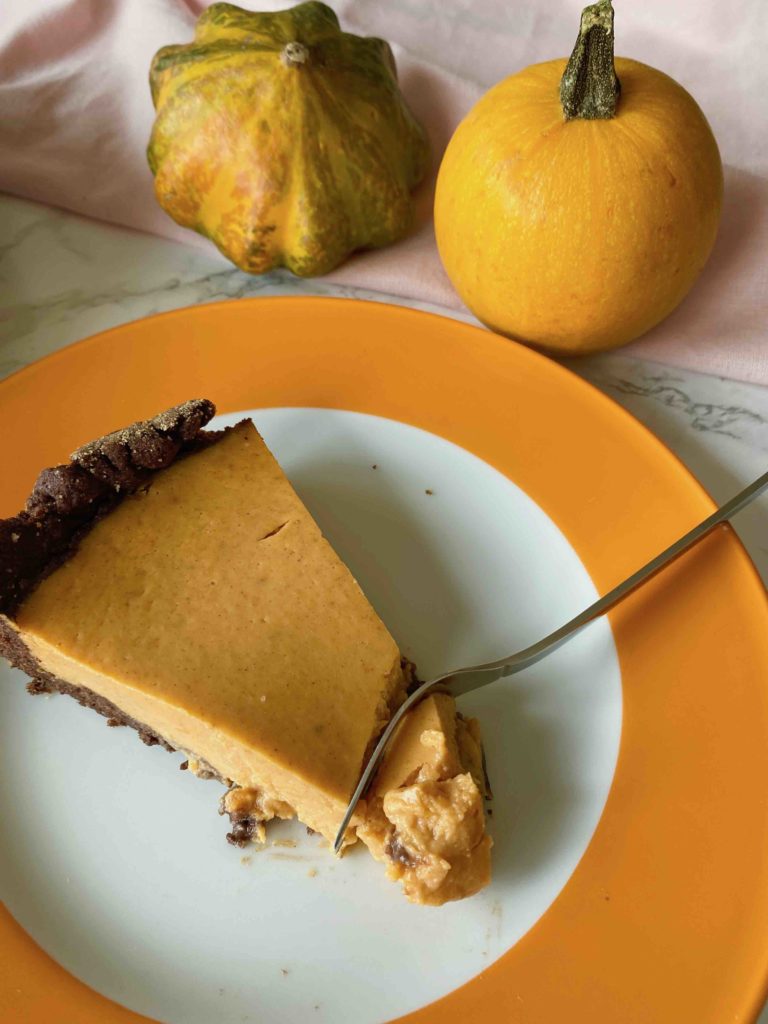
Halloween without pumpkin pie? Unthinkable! This year, my minis and I are baking a classic pumpkin pie with a special twist: a Halloween pumpkin with a carved spooky face!
Ever since my minis saw their first glowing, carved pumpkin and thought it was absolutely amazing, we’ve been buying Halloween pumpkins every year on our way to our favorite café and carving two of them. Or should I rather say: I carve two pumpkins. From the leftover pumpkin flesh, we’ve made many delicious treats over the past few years, such as our moist “Flecken” cake or or our chocolatey bat cake .
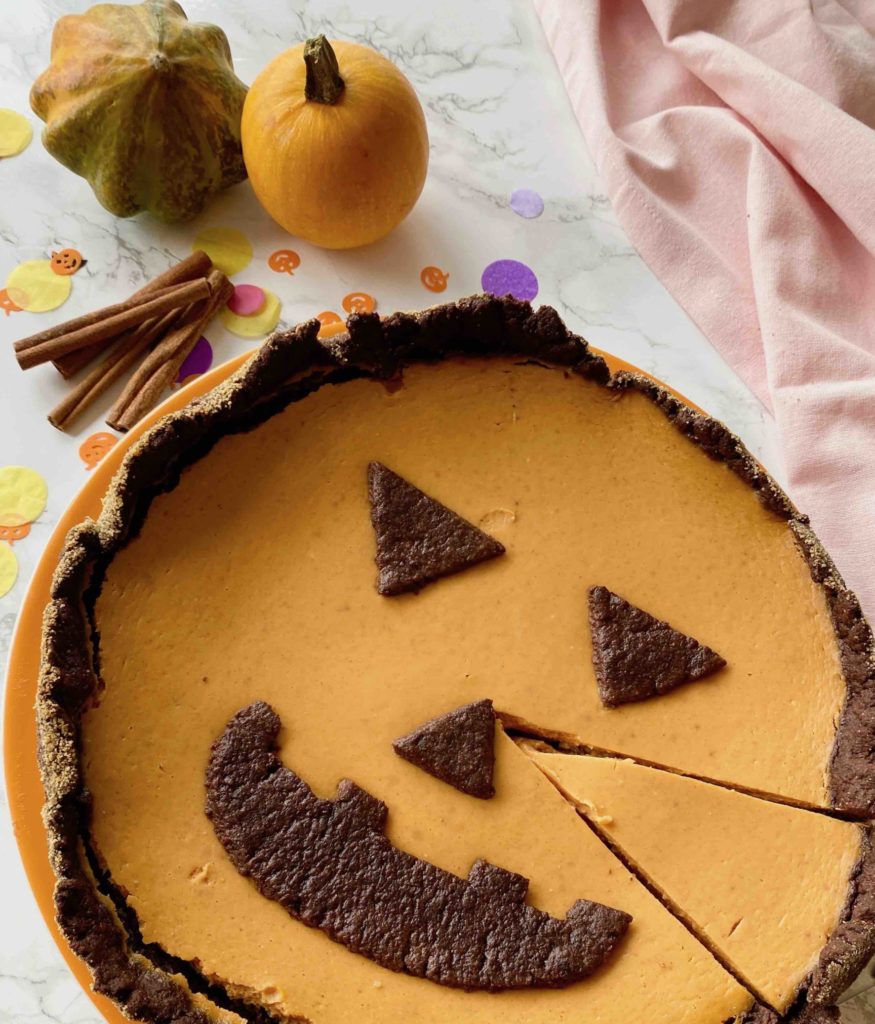
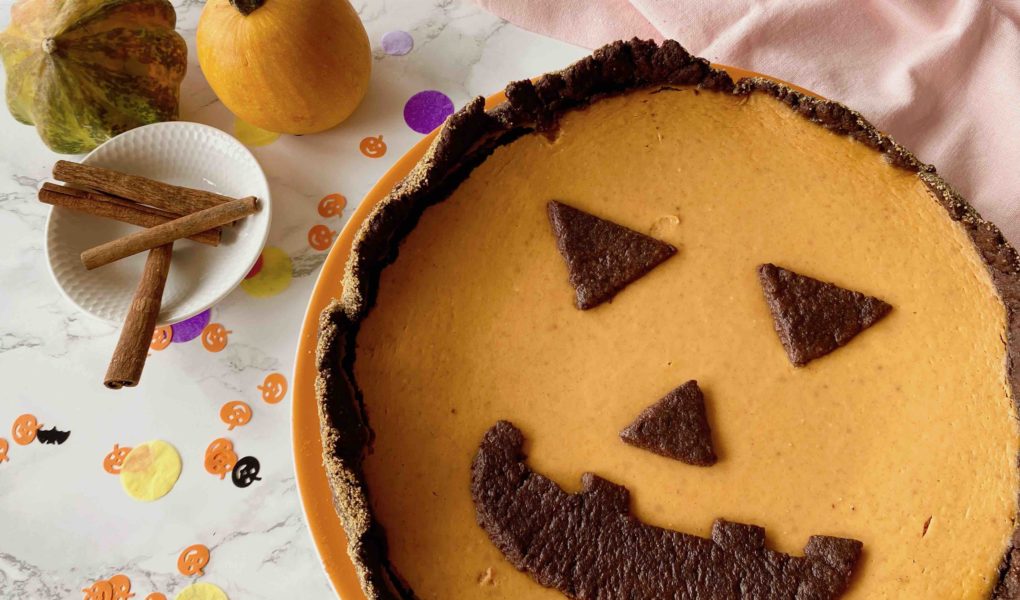
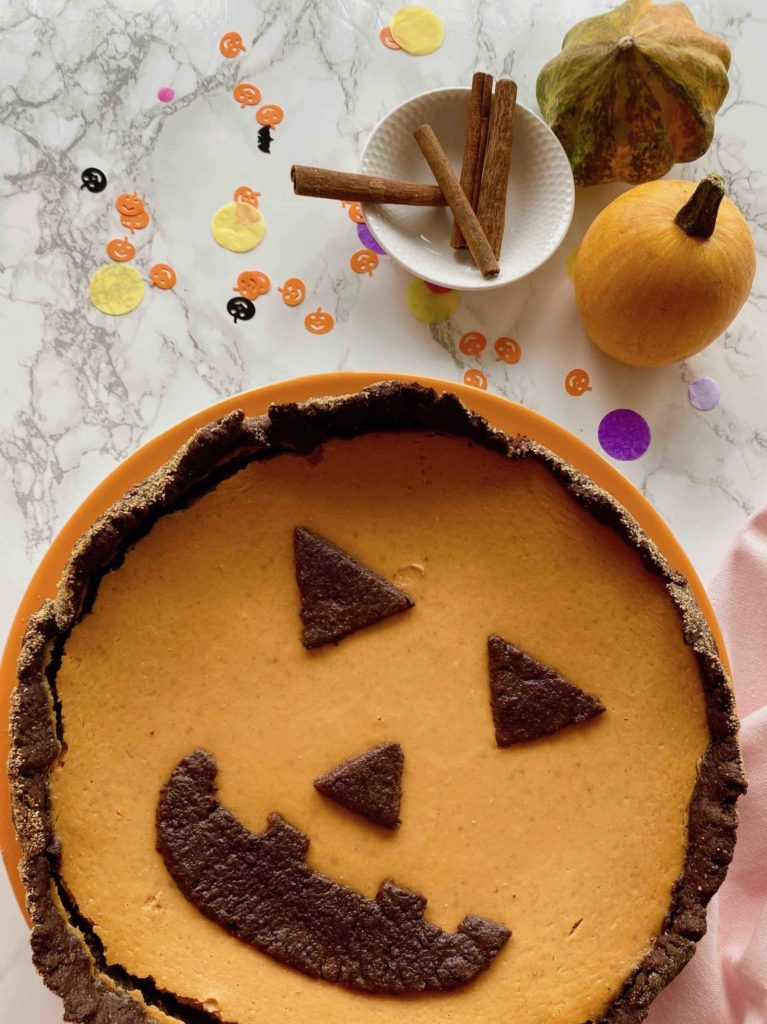
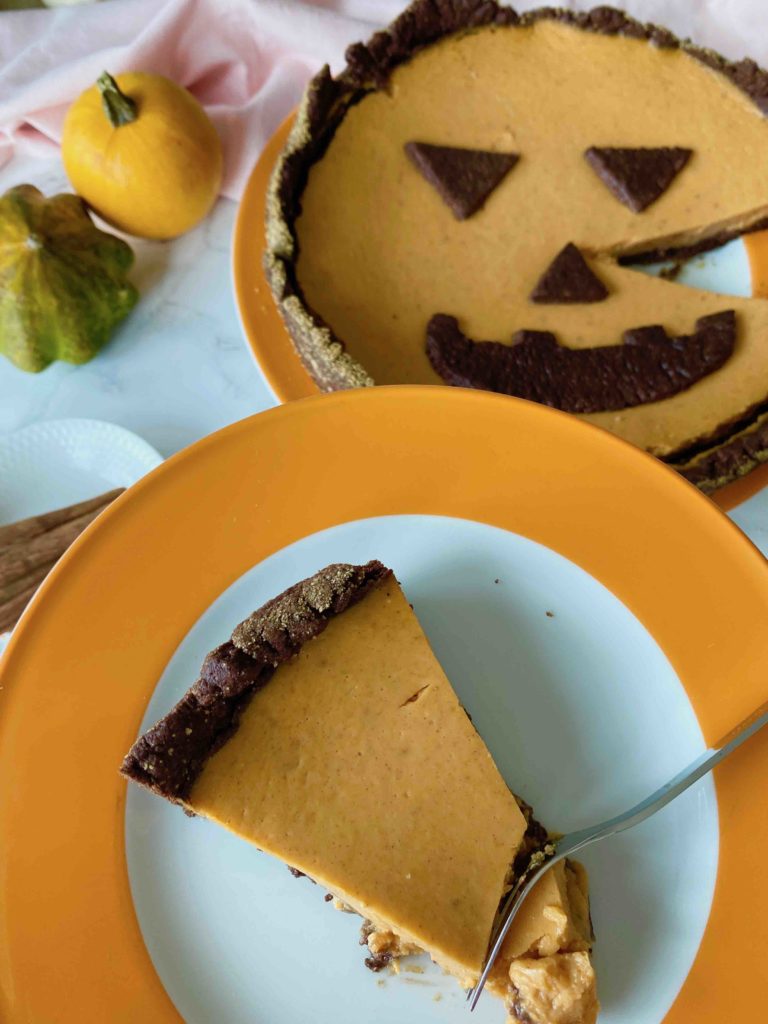
This year, we’re not only hollowing out two pumpkins and giving them spooky faces… This year, for the first time, we’ve BAKED a Halloween pumpkin with a creepy face!
To do this, we baked a classic pumpkin pie Pumpkin Piewith a chocolate shortcrust pastry base and carved a “pumpkin face” out of the shortcrust pastry!
Halloween-Baking with kids – Would you also like to have a spooky Halloween baking event with your kids and friends? I've put together great baking highlights for Halloween for you here! From muffin and baking cups to matching edible decorations, you'll find spooky Halloween cake decorations in this list! Have fun browsing!*
Recipe for our Halloweentastic Pumpkin Pie
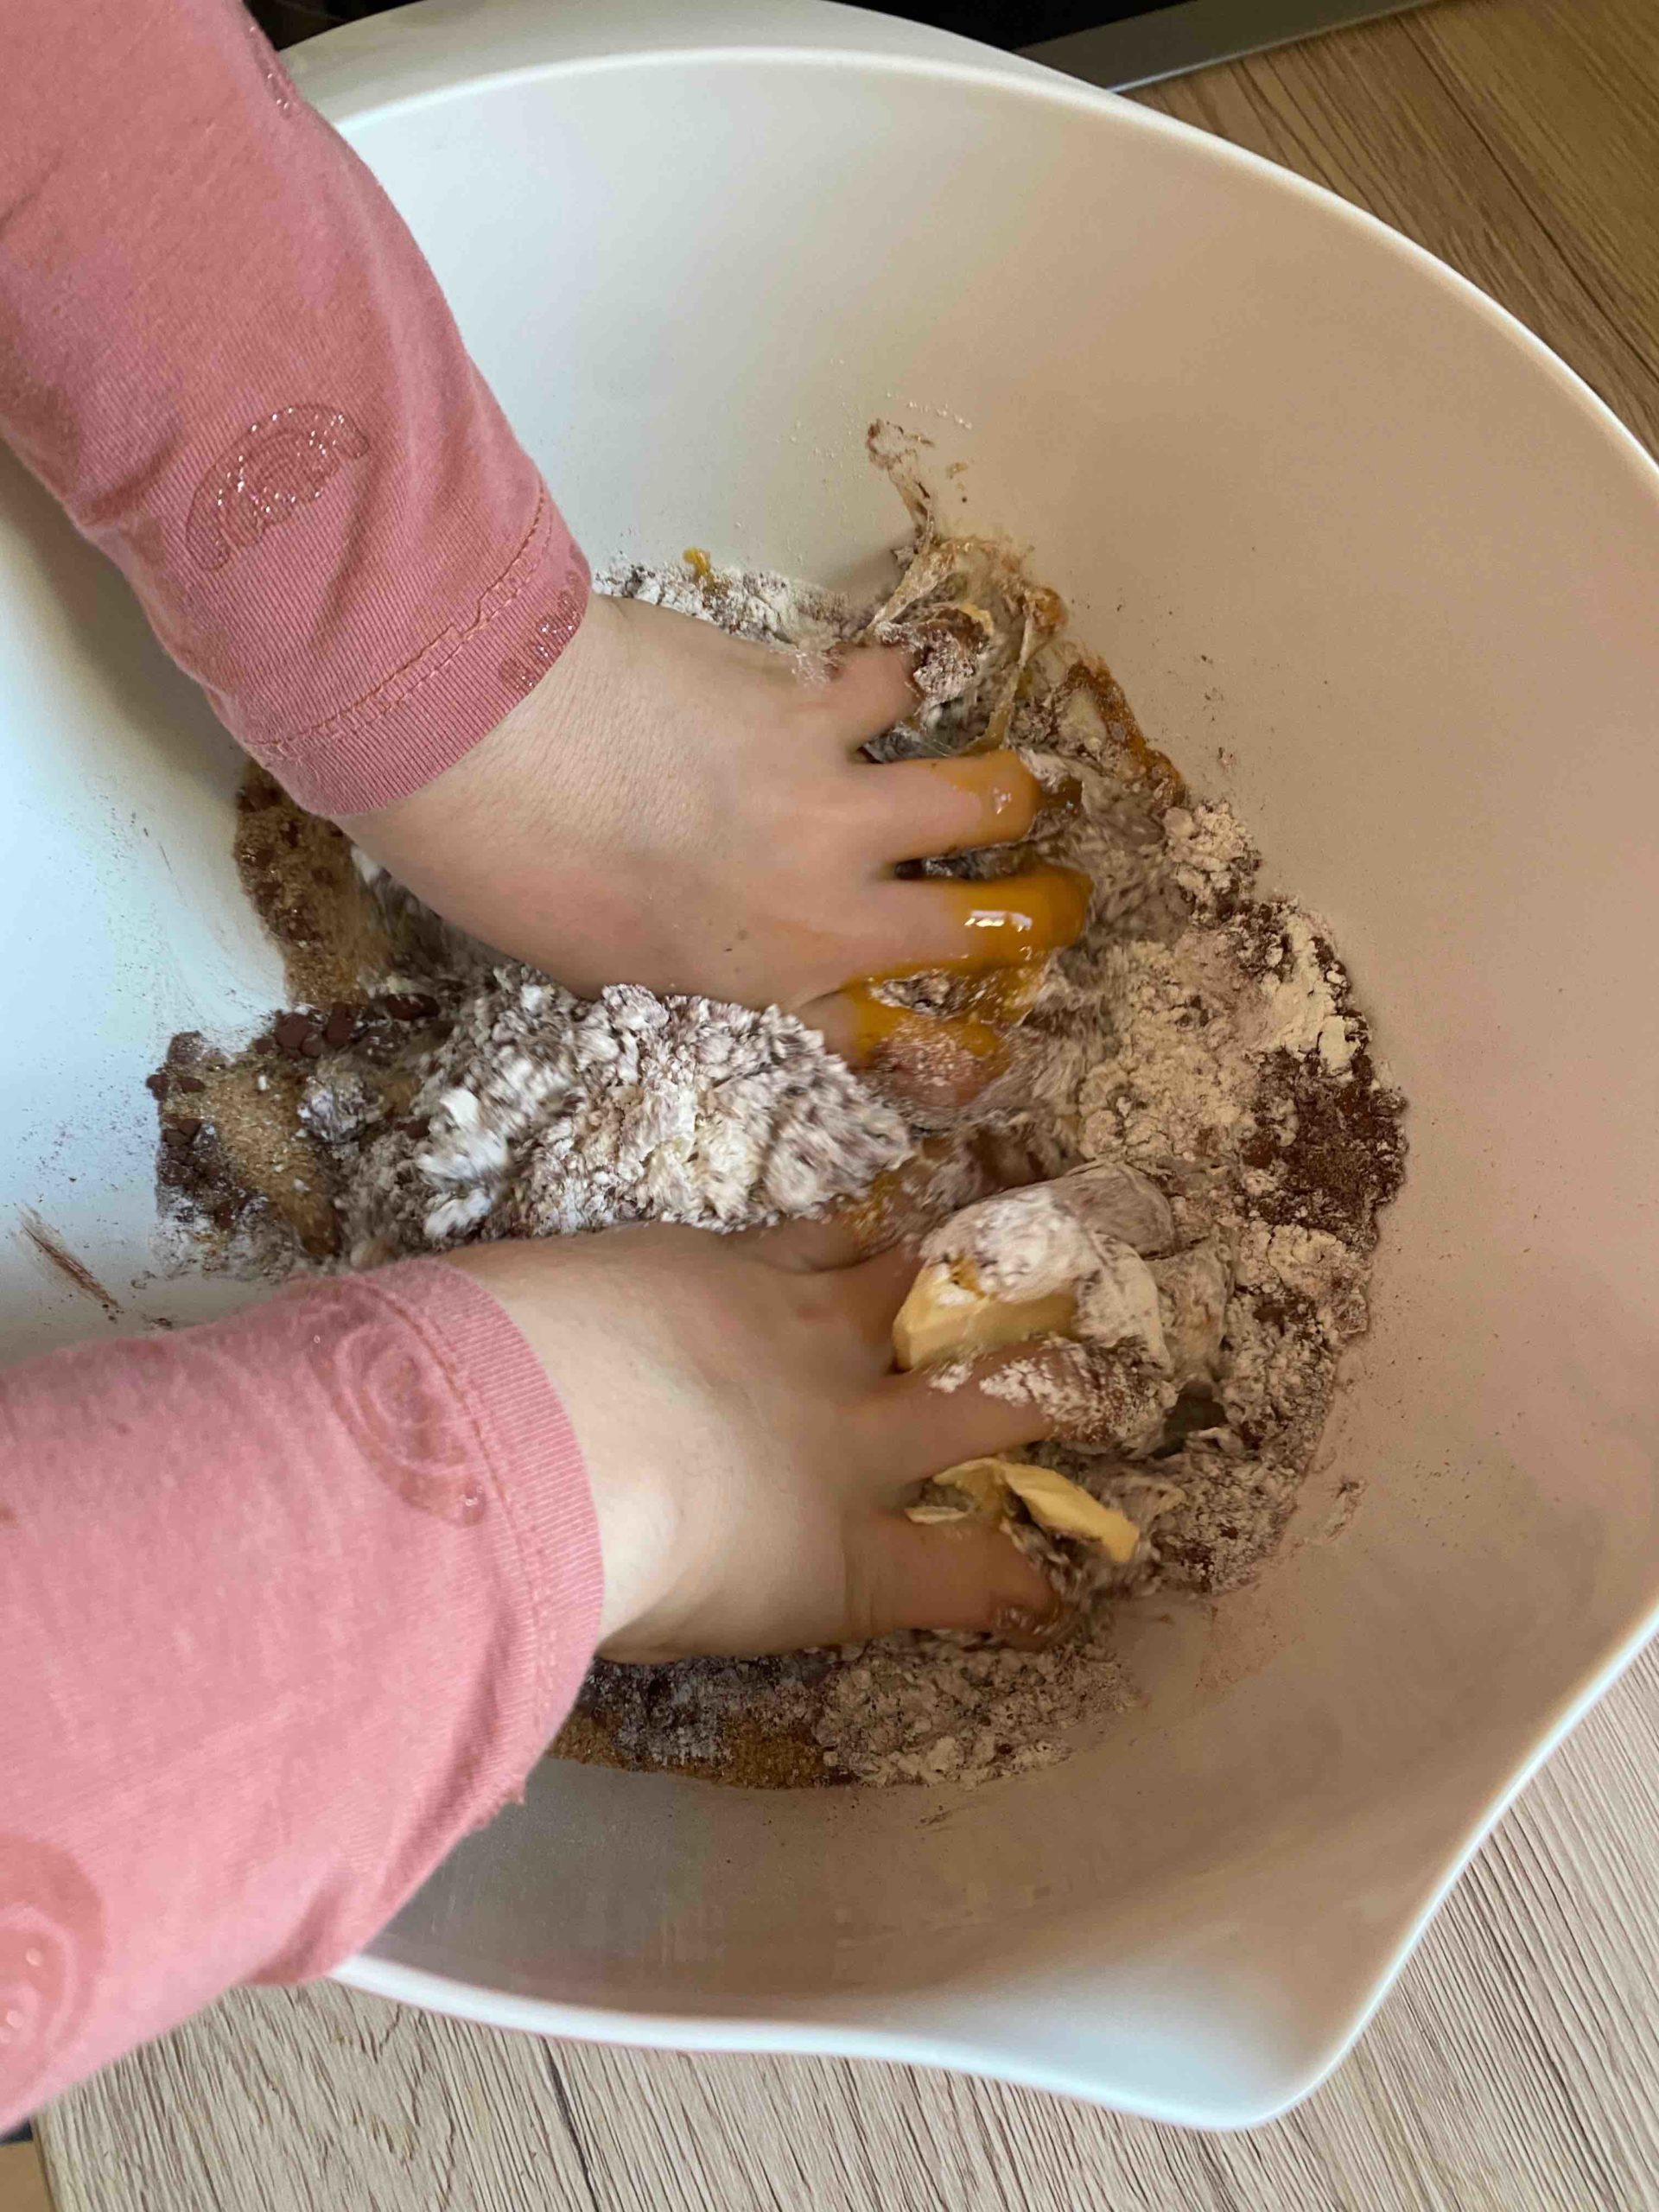
This pumpkin pie is an absolute highlight for baking with children at Halloween! It’s best to bake this recipe together, since the shortcrust “pumpkin face” needs to be placed on the partially baked pie during baking. Pressing the shortcrust into the pie dish and later removing the pie from the dish is also easier with teamwork.
I let my minis press the shortcrust pastry edge into the dish. This resulted in a rather “rustic,” uneven edge. Personally, I think the “rustic” look suits a Halloween pumpkin very well. But if you prefer a smooth edge, you can trim it with a blunt knife before baking.
Ingredients
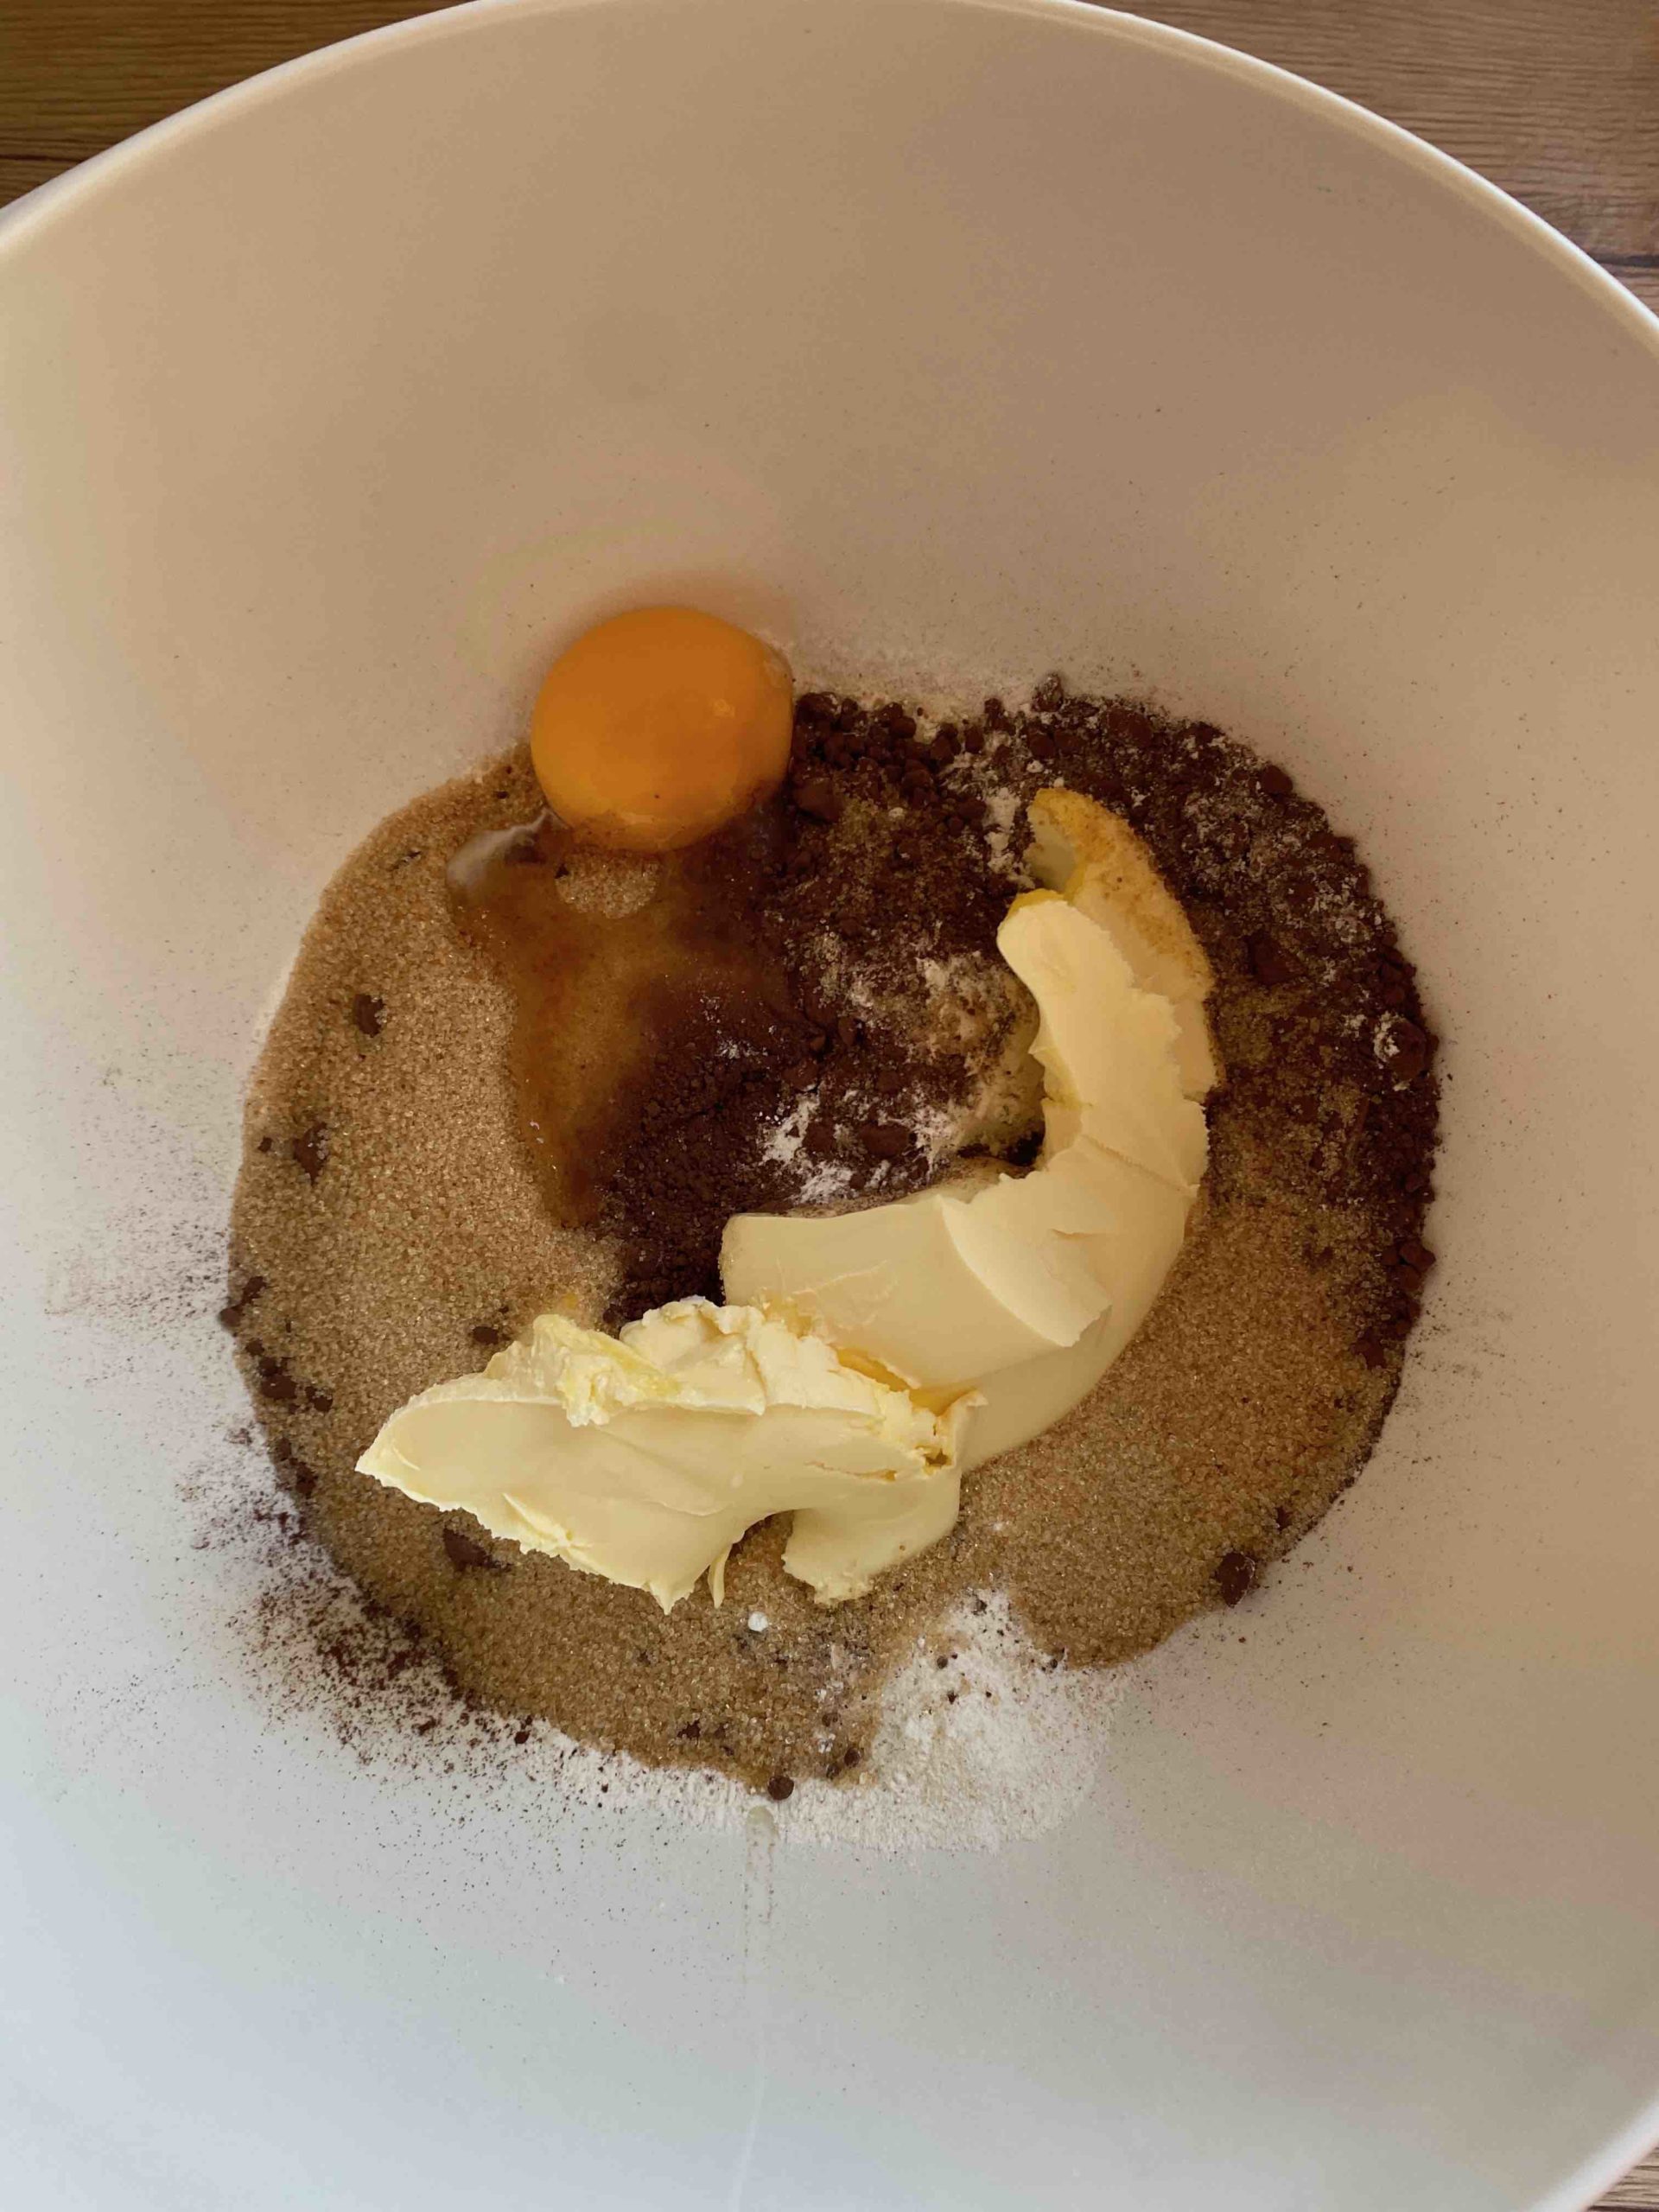
Shortcrust pastry
- 220 g flour
- 30 g baking cocoa
- 1 teaspoon baking powder
- 90 g brown sugar
- 1 pinch of salt
- 125 g cold margarine
- 1 egg yolk
- 3 tbsp lemon juice
- Flour for the work surface
- Grease for the tin
Filling
- 700 g pumpkin purée
- 180 g brown sugar
- 1 tsp cinnamon powder
- Optional: 1 tsp pumpkin pie spice* (we use “Pumpkin Pie Spice” from Just Spices)
- 3 eggs
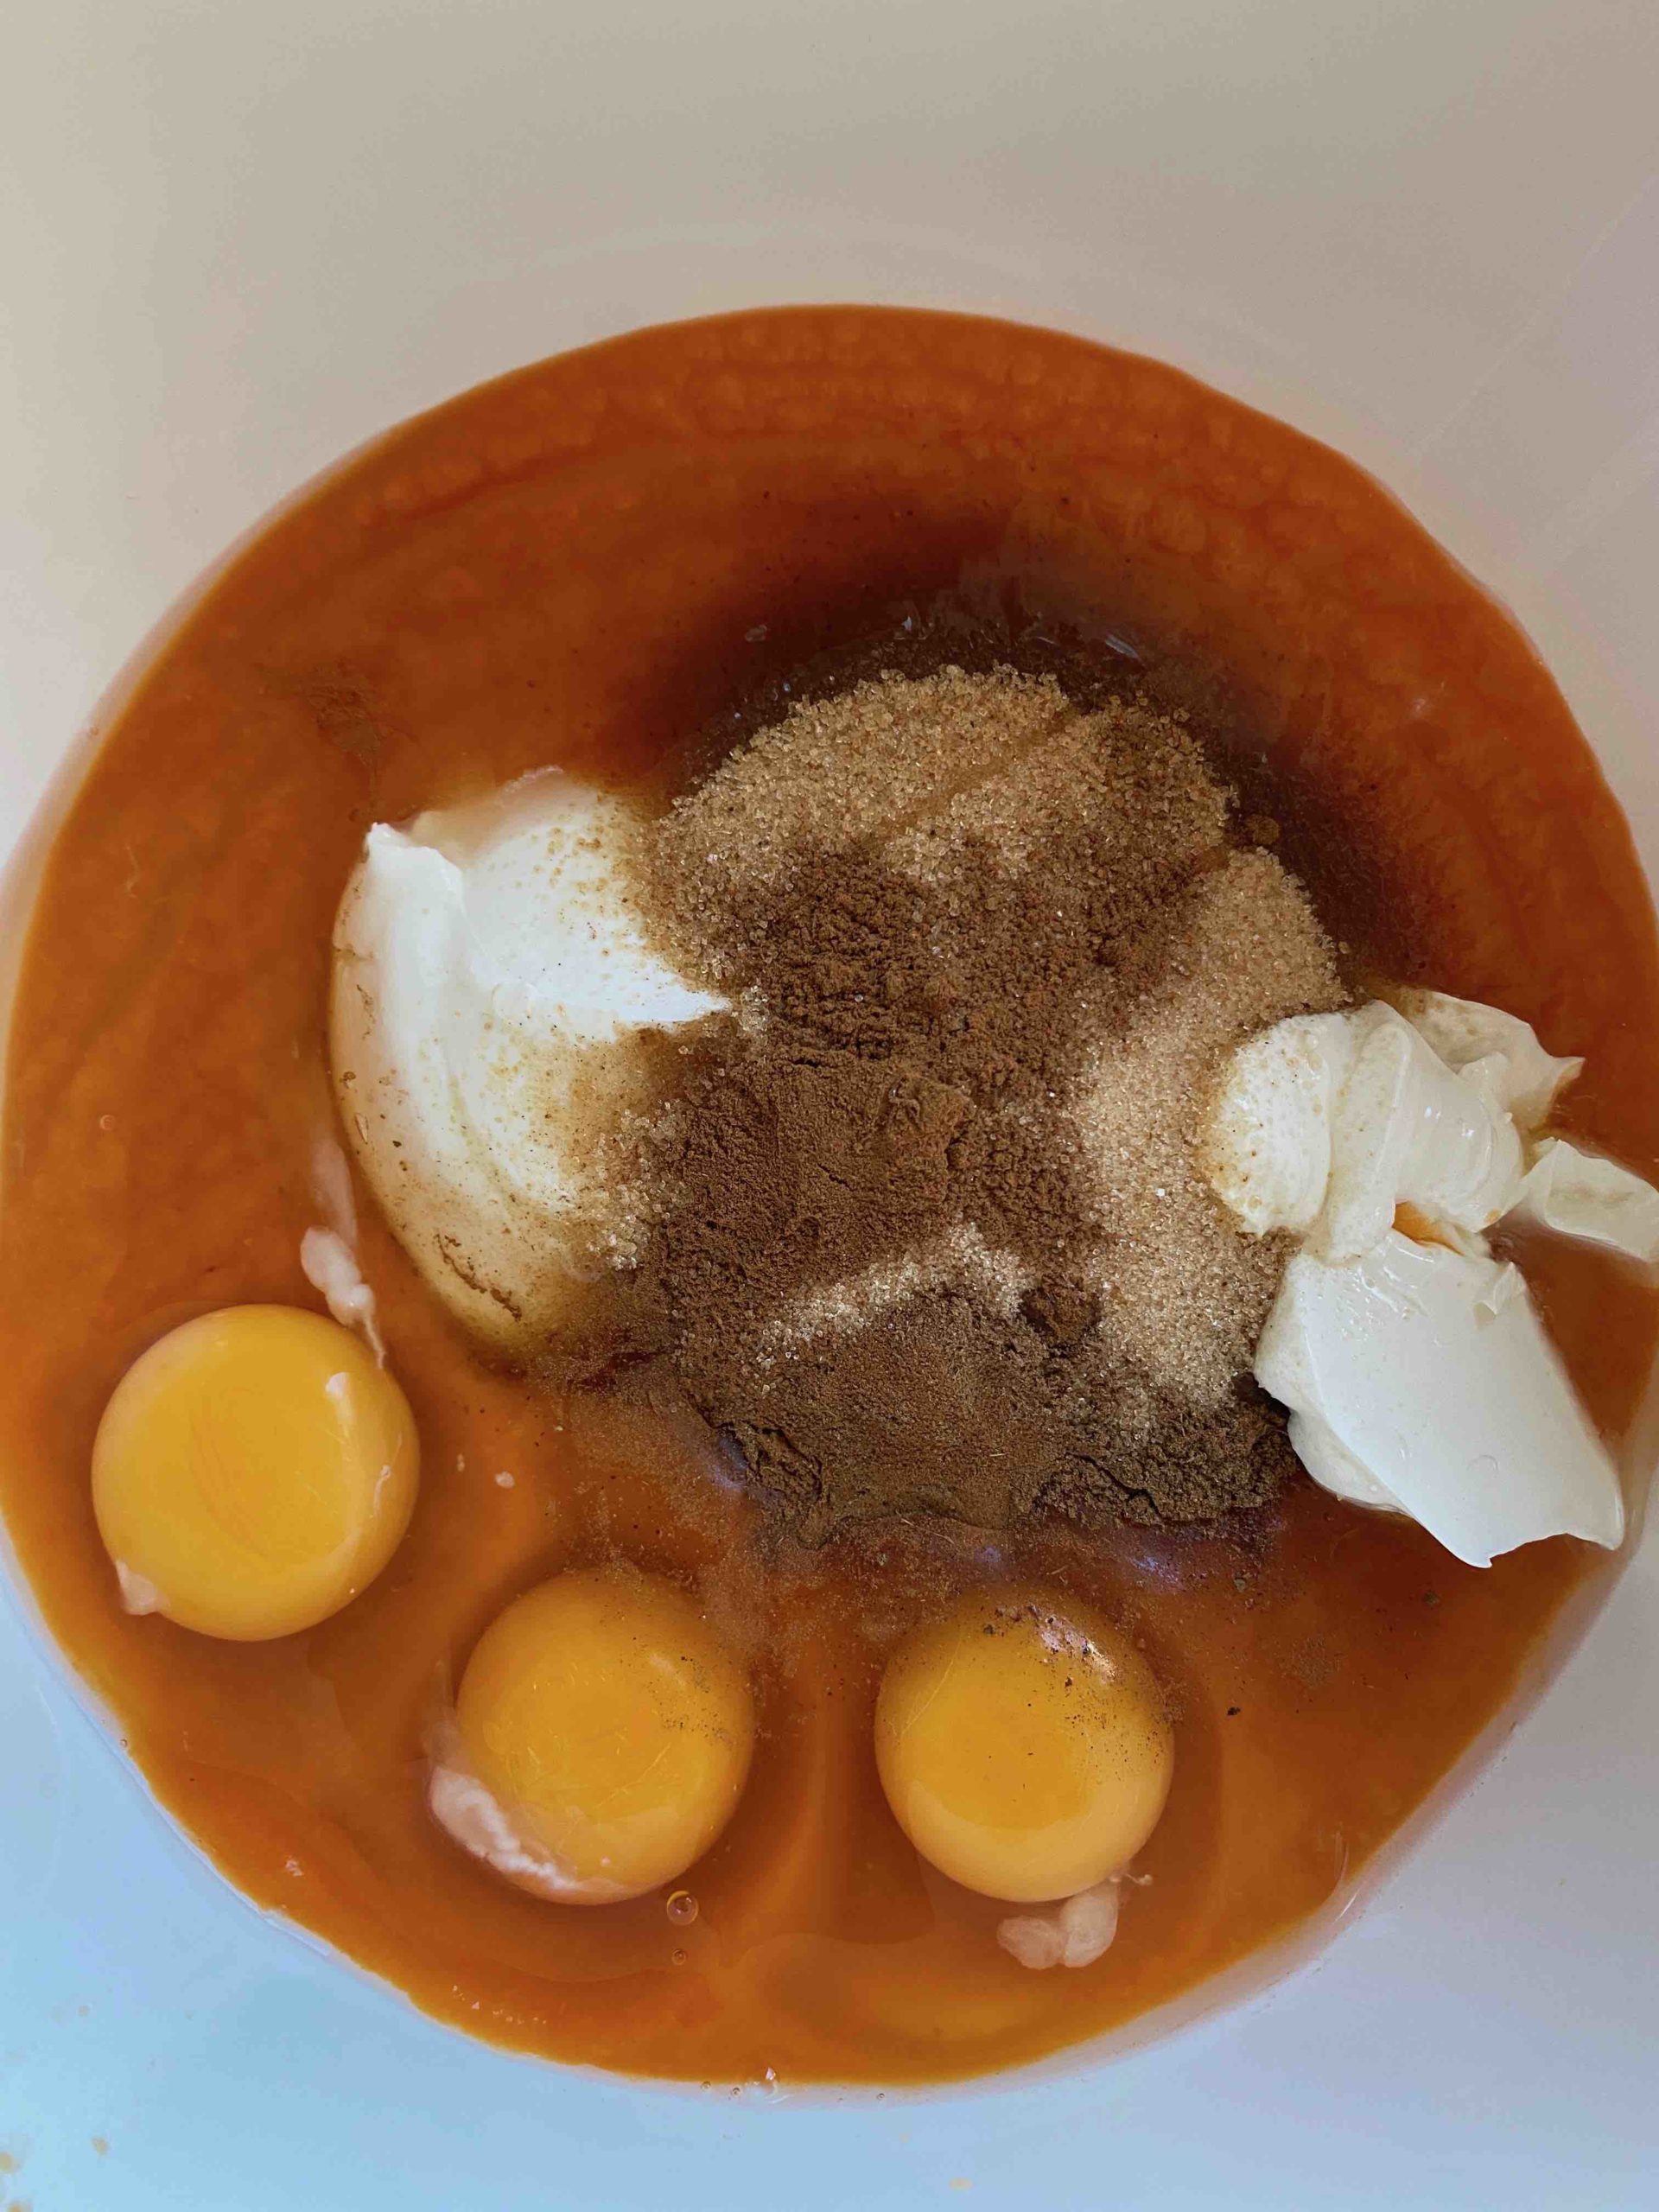
- 1 pinch of salt
- 200 g cream cheese

DIY Halloween Treats
Trick or treat? With our DIY print template you can make creative Halloween treats with your kids from Ritter Sport Minis and hand them out on Halloween or bring them to the Halloween party as a small guest gift. Here you can find our DIY print template.
Trick or Treat?
Baking accessories
Kitchen scale, mixing bowl, hand mixer, whisk, cling film, rolling pin, sharp kitchen knife, pie dish* (you can also use a springform pan), fork, cooling rack
Preparation
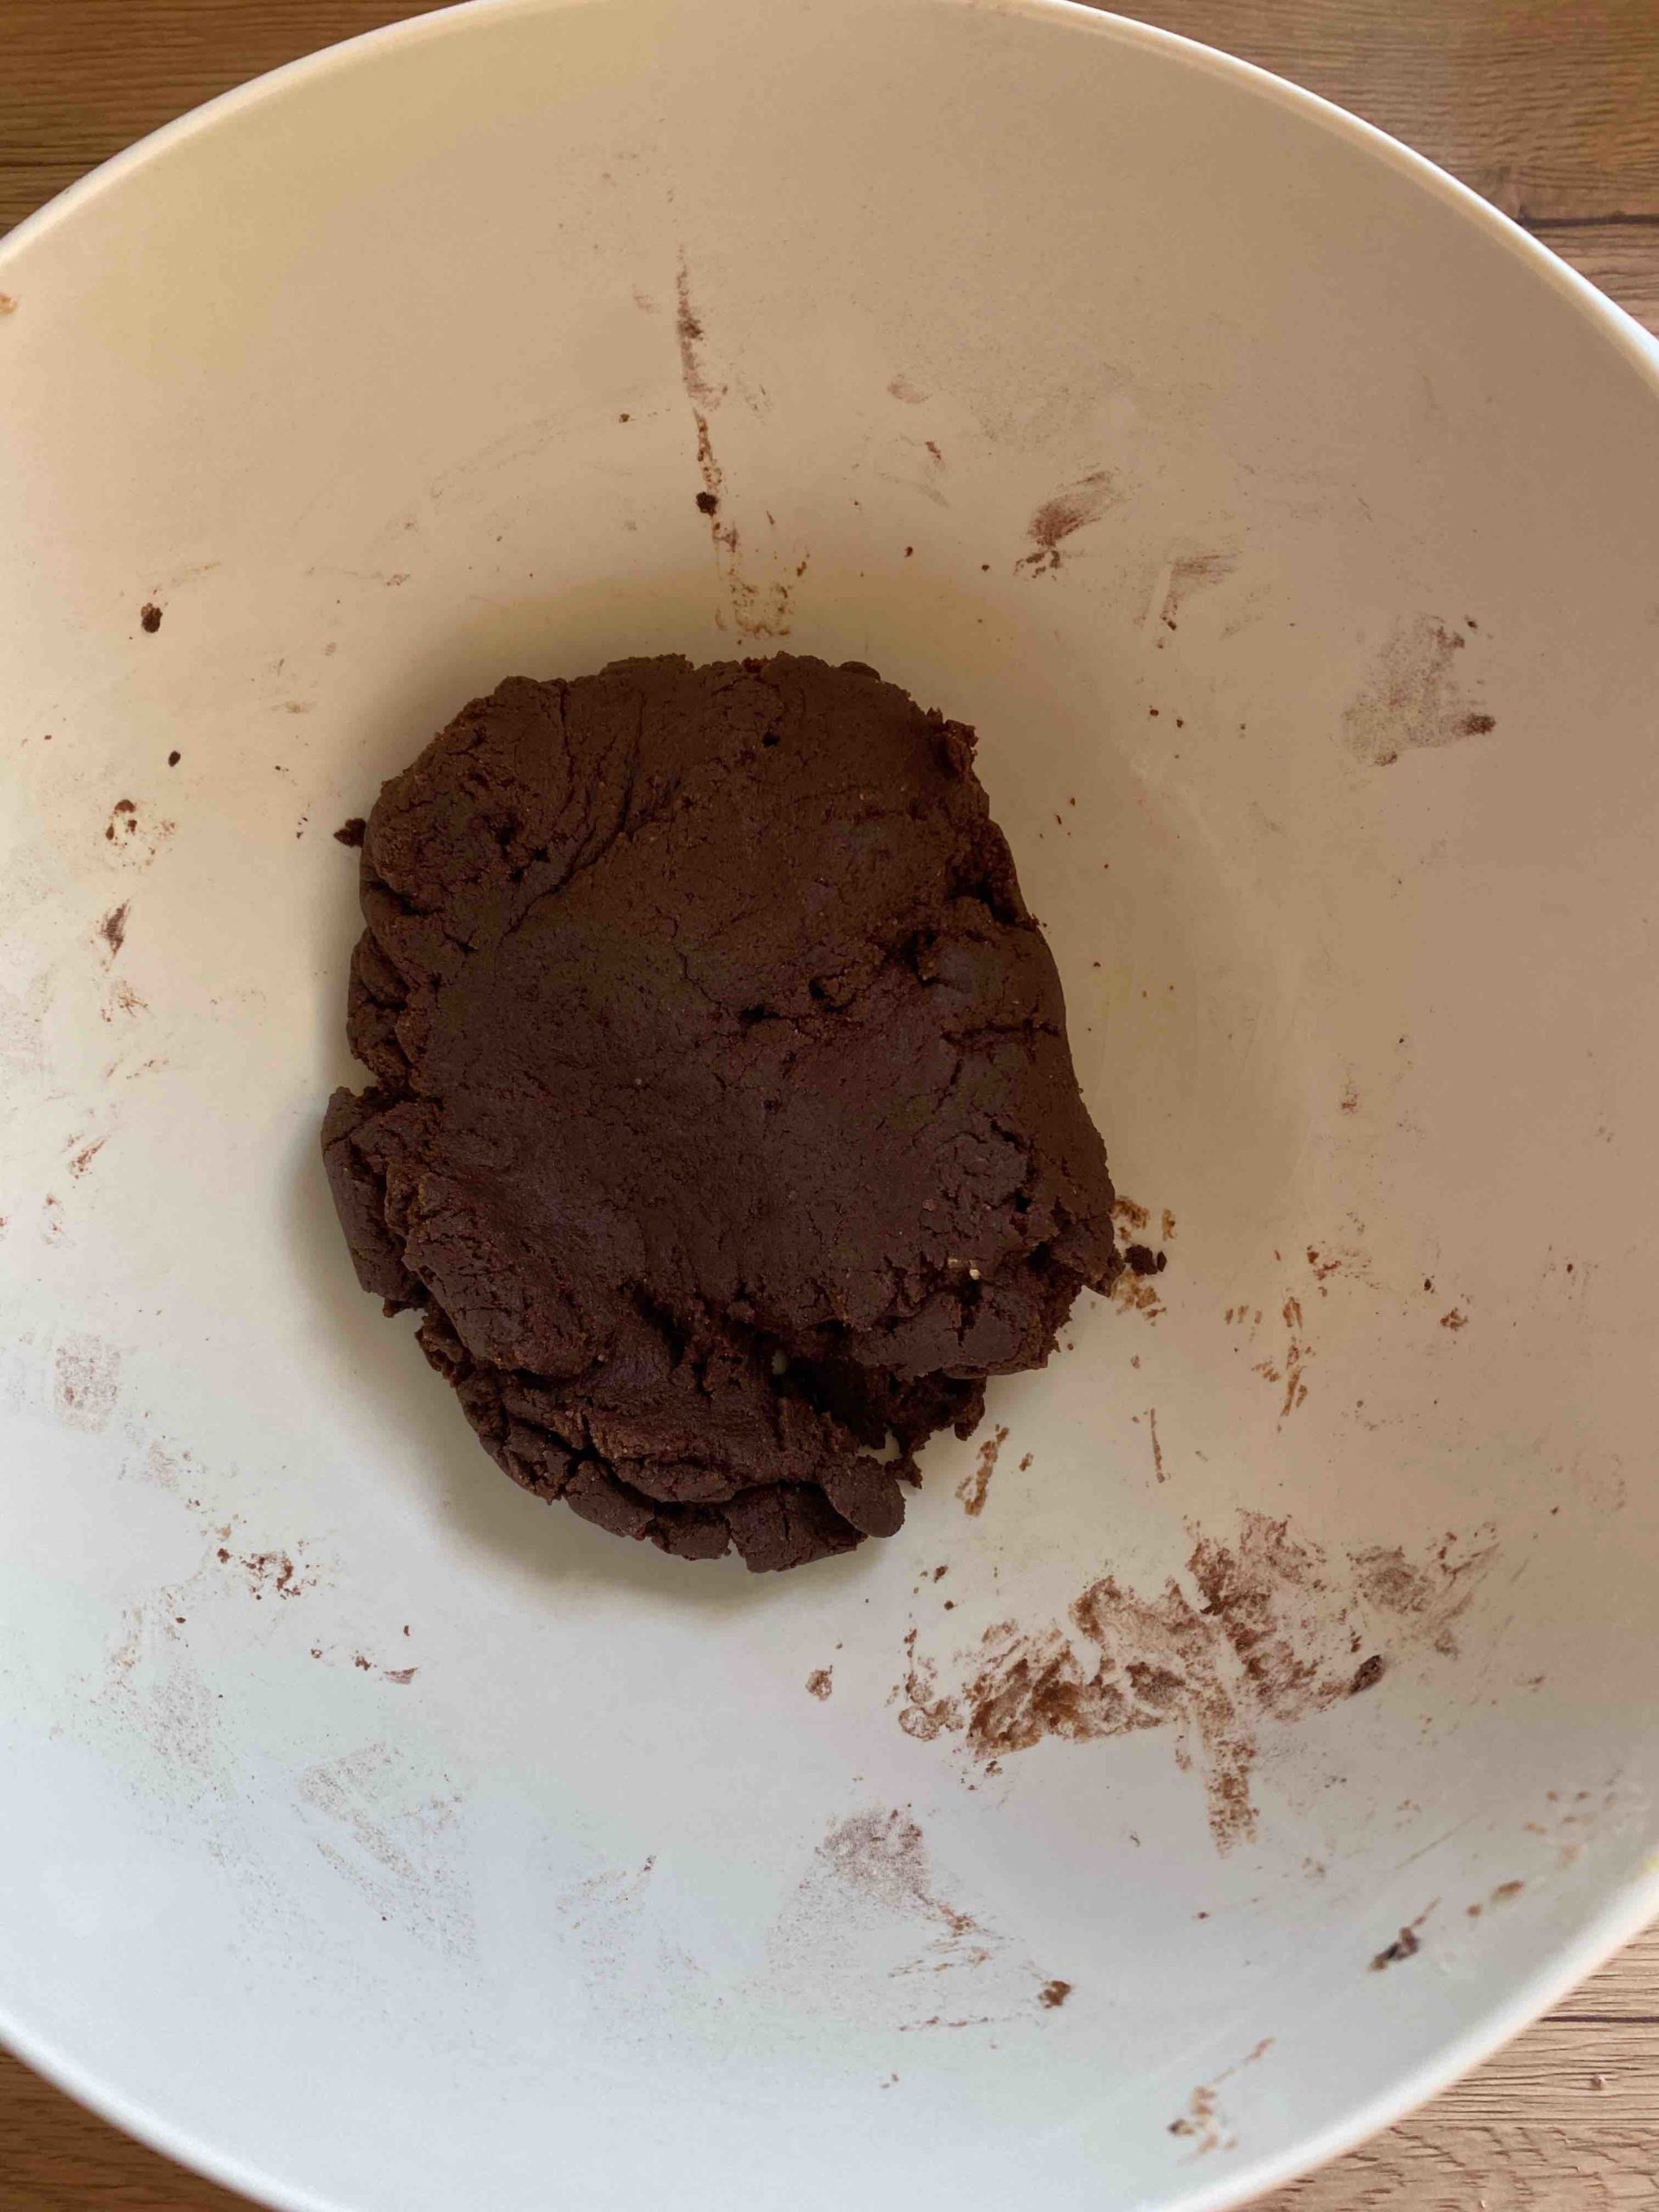
- First, you and your minis mix the flour, cocoa powder, baking powder, sugar, and salt for the shortcrust pastry in a mixing bowl. Then add the cold butter in small pieces, egg yolk, and lemon juice, and knead by hand into a smooth dough. Wrap the dough in cling film and chill in the fridge for 30 minutes.
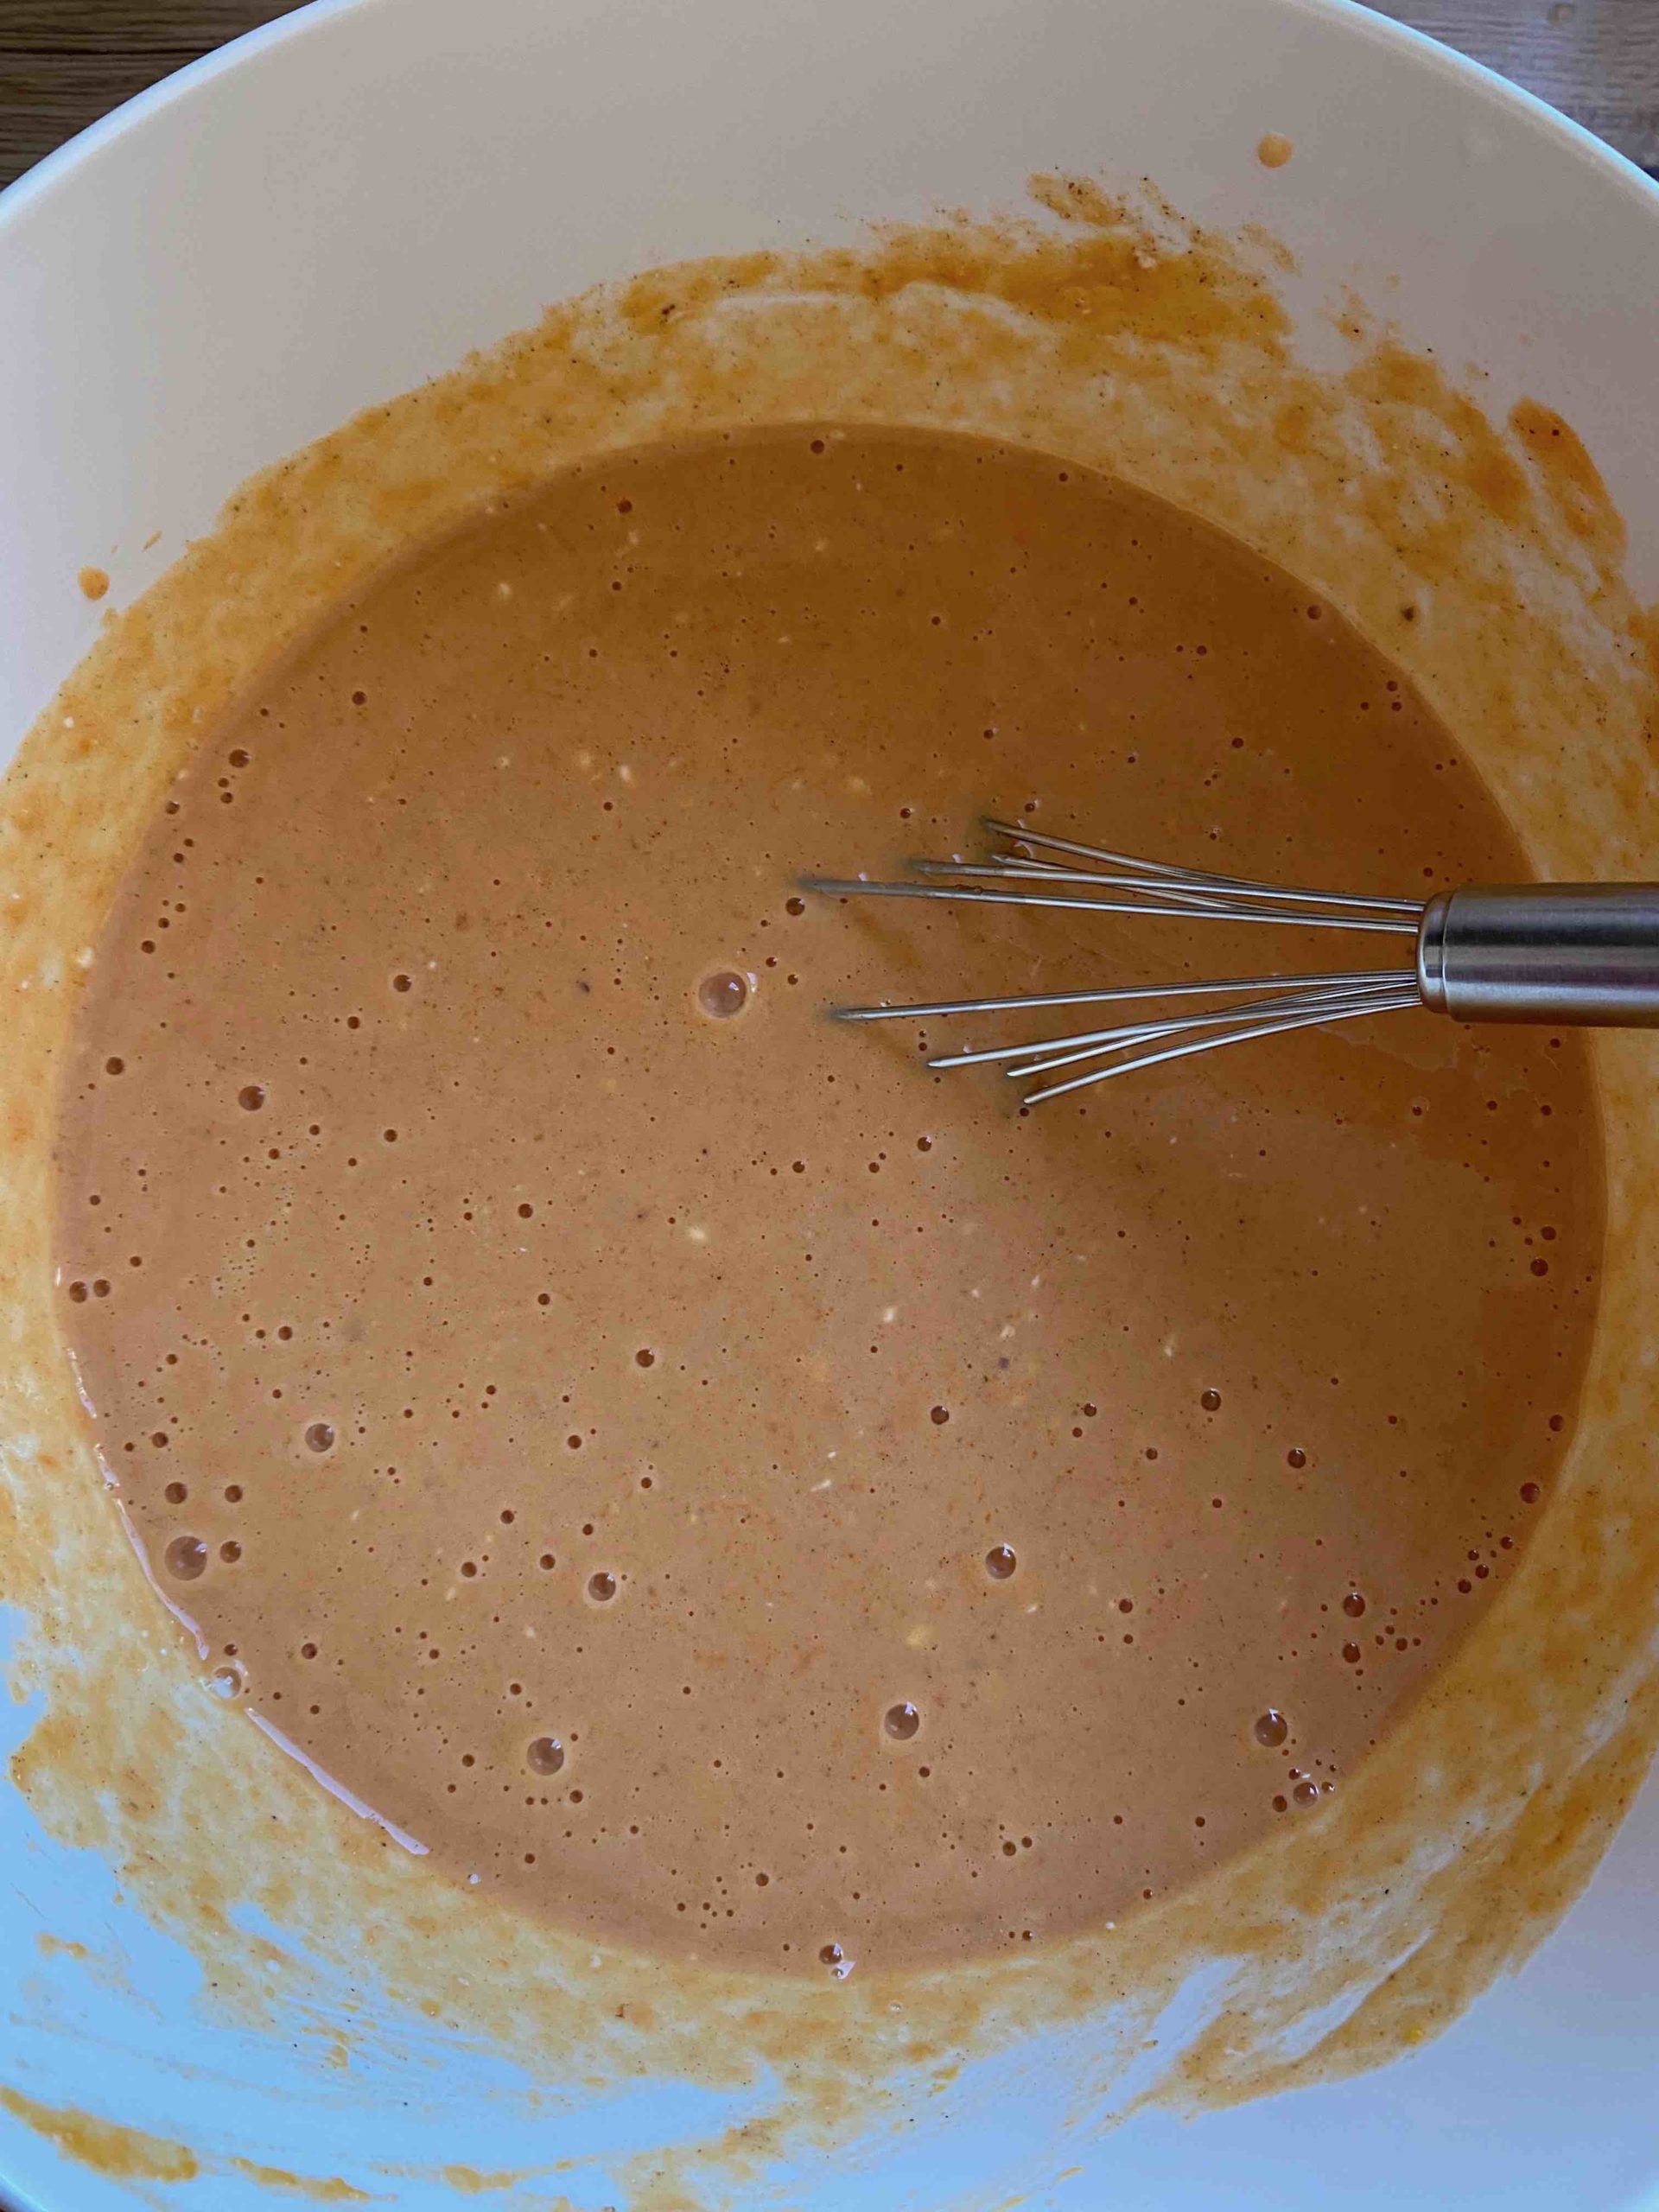
- For the filling, stir together the pumpkin purée, brown sugar, cinnamon, pumpkin pie spice, beaten eggs, a pinch of salt, and cream cheese in a mixing bowl.
- Preheat the oven to 175°C top/bottom heat.
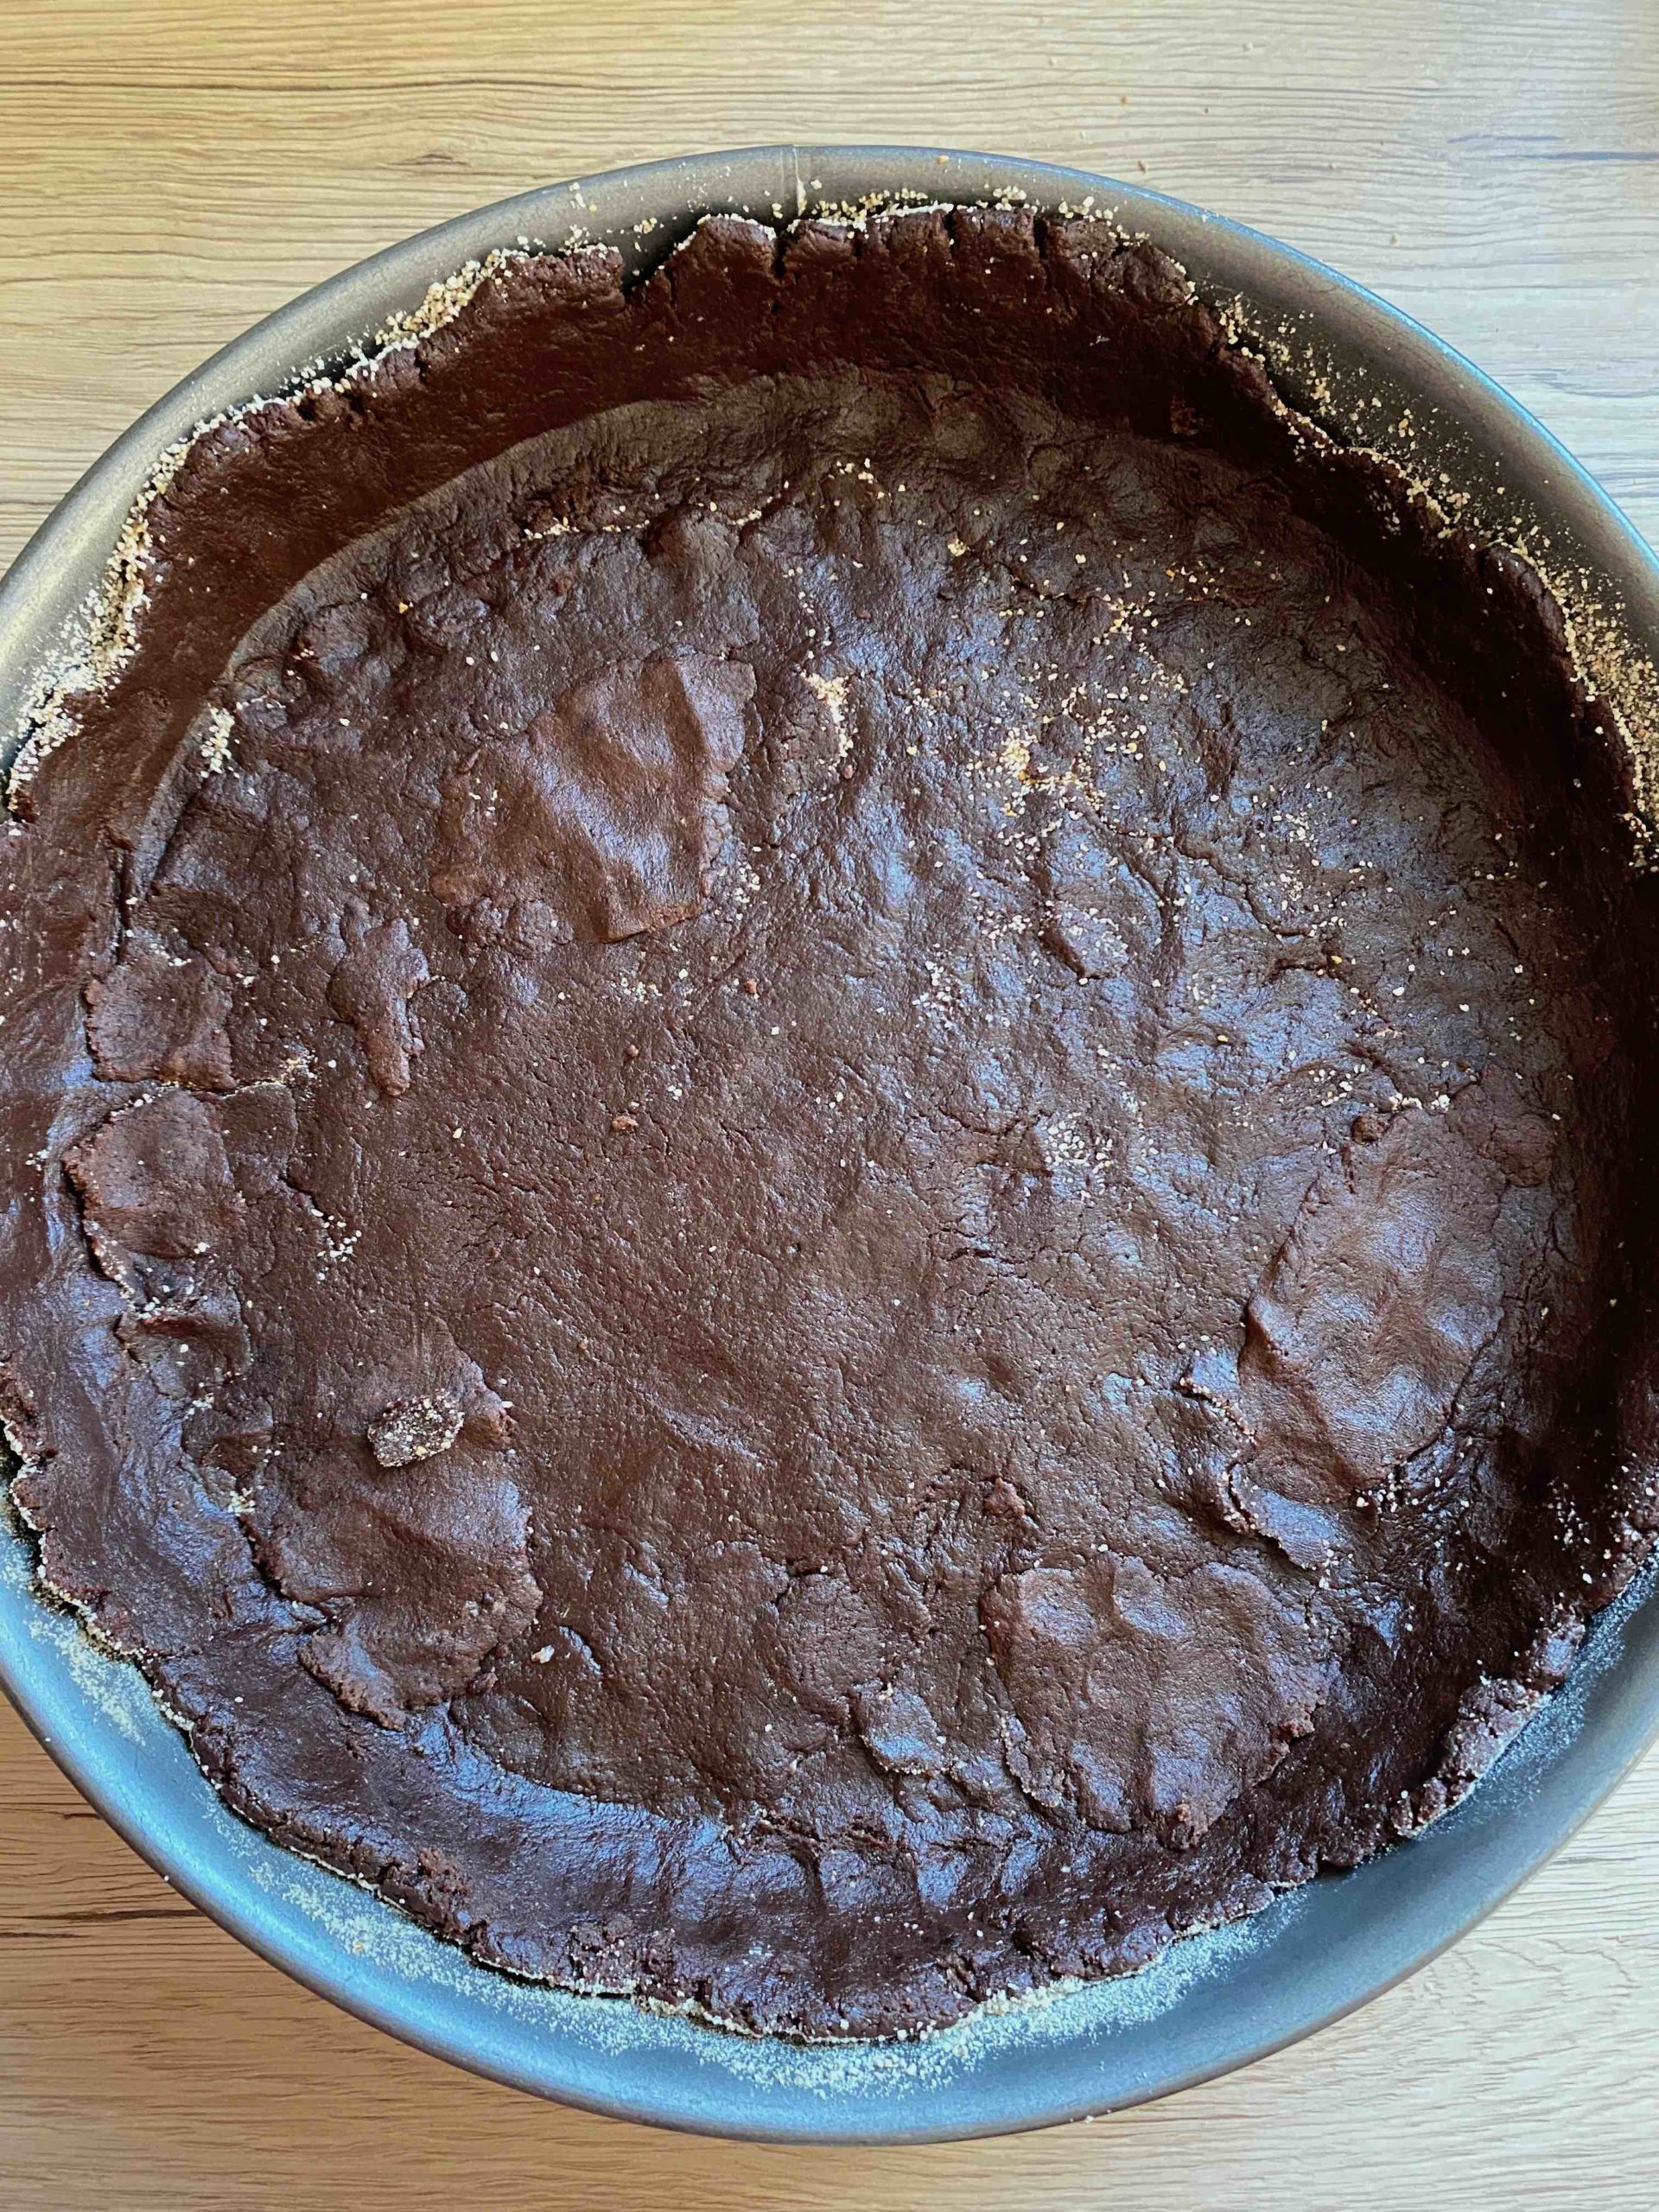
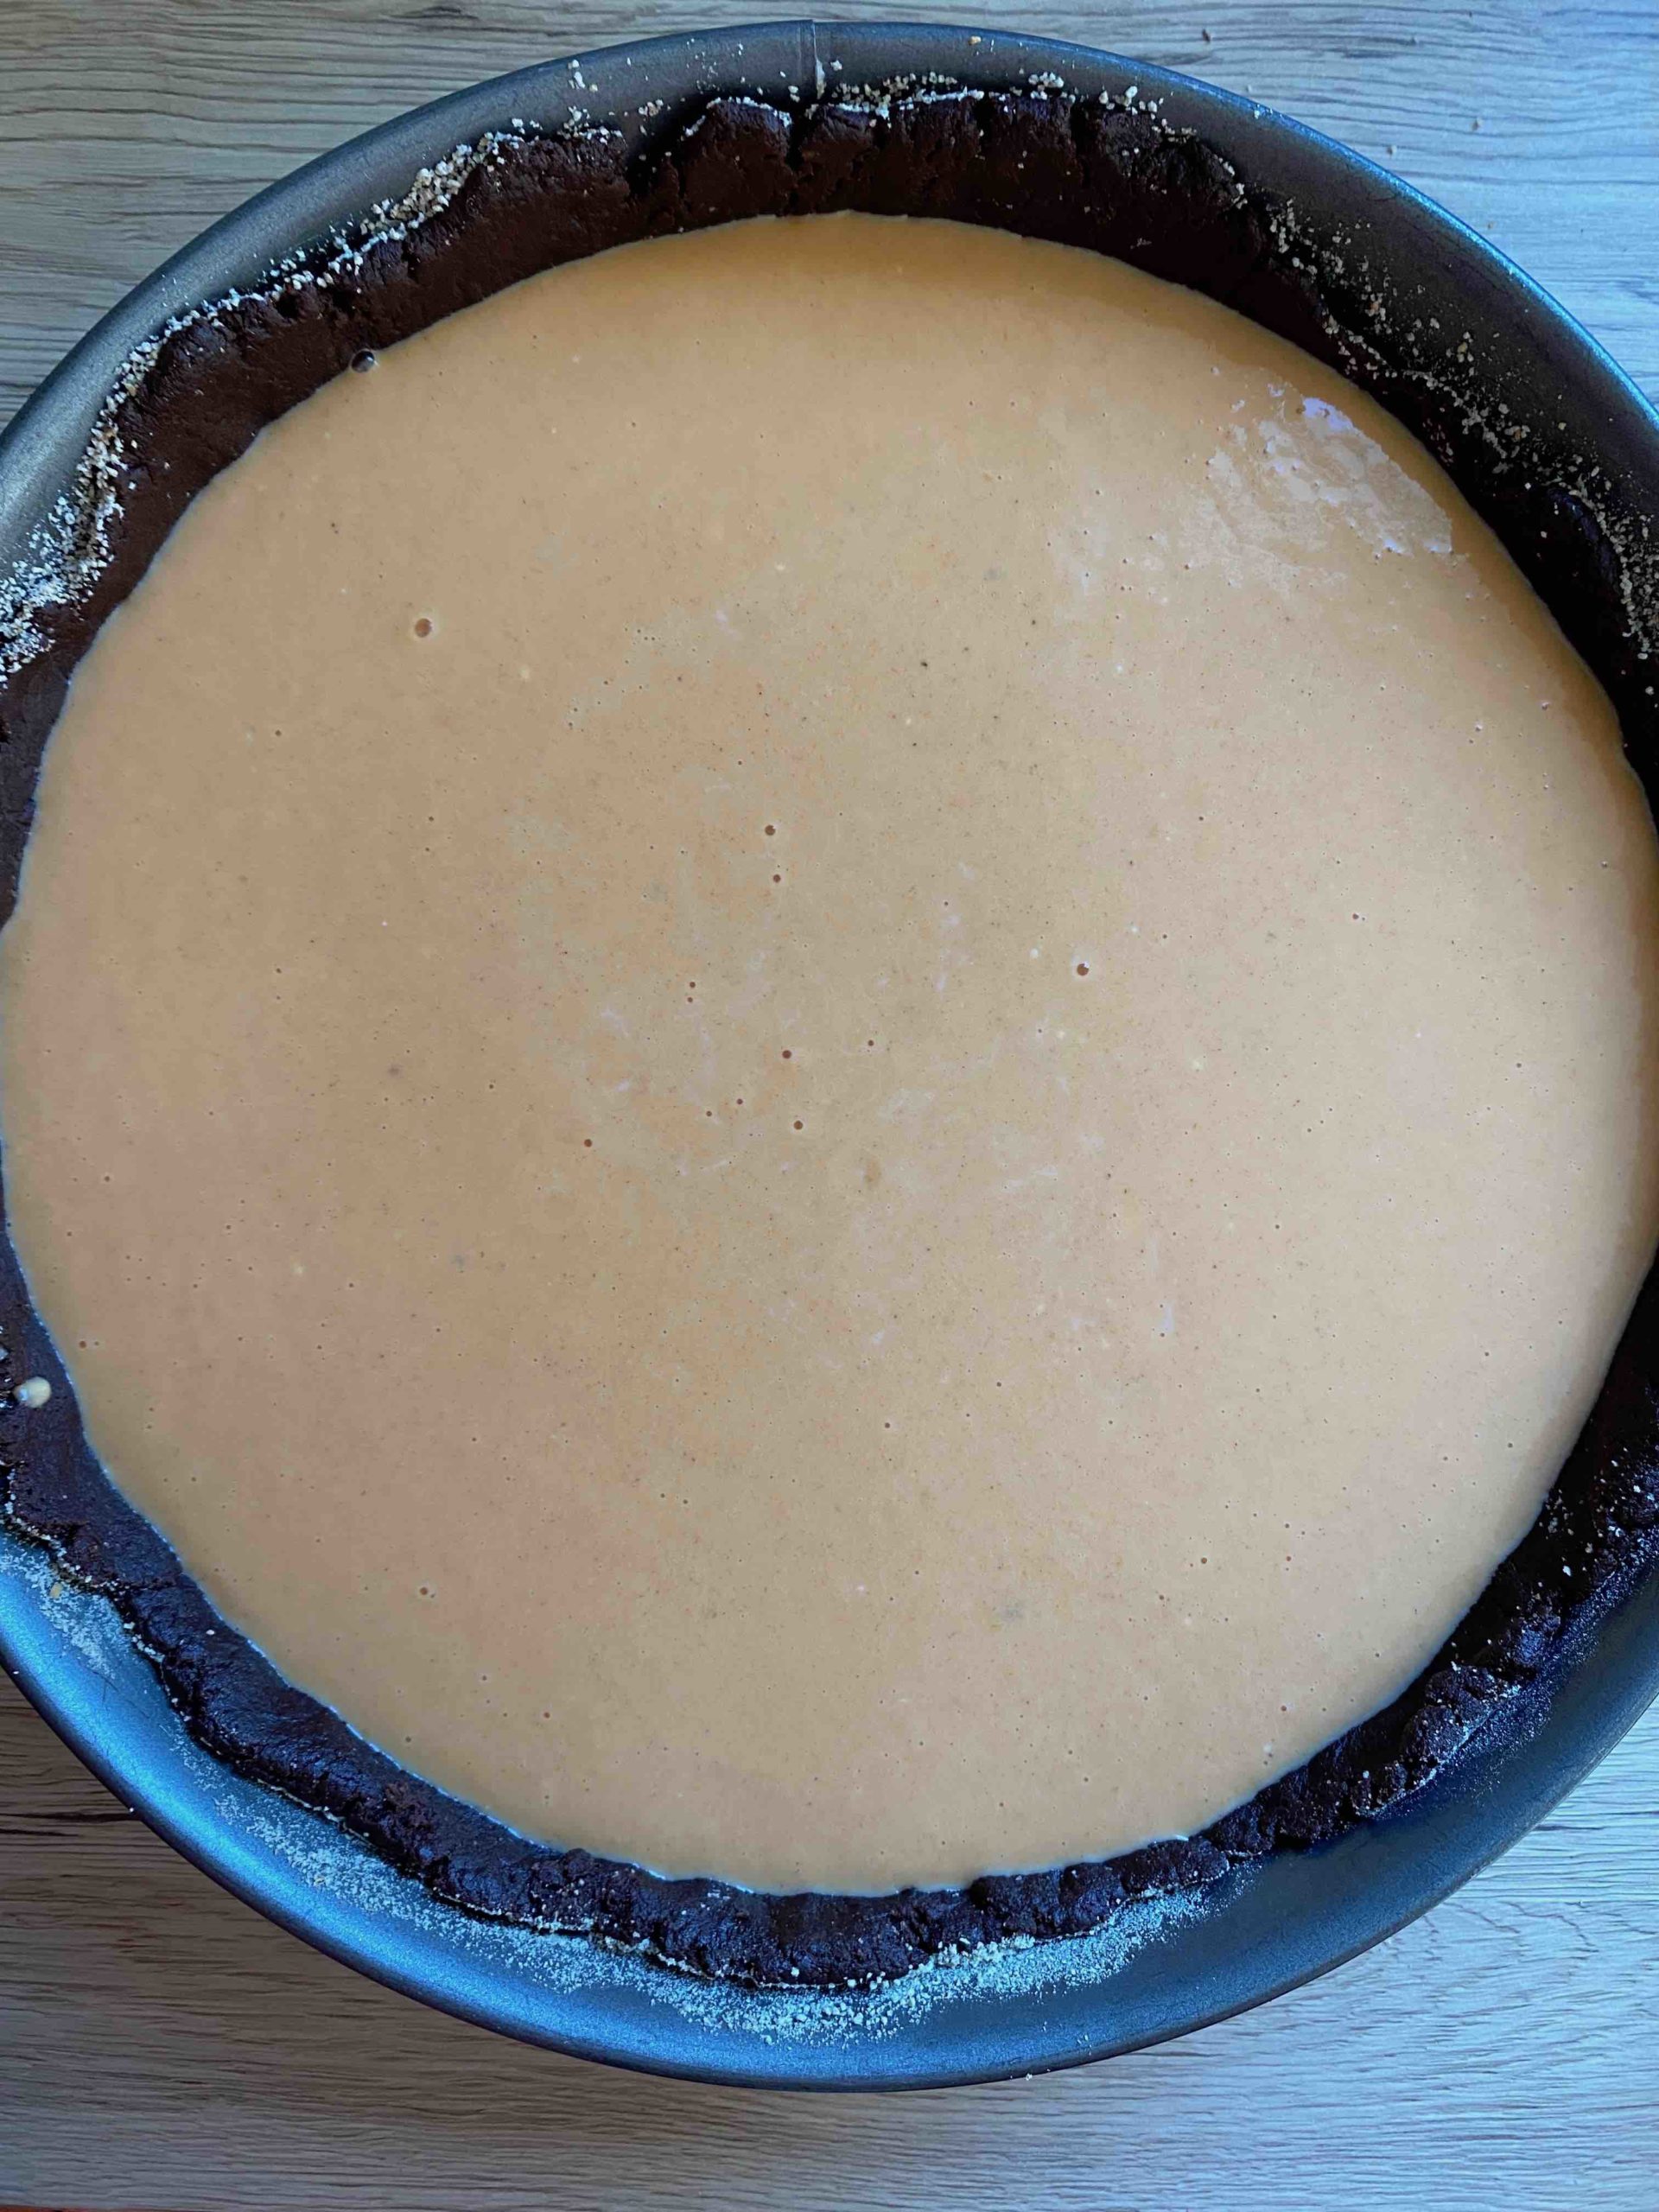
- Knead the dough briefly on a floured surface and shape into the crust. Set aside a ball of dough about 4 cm in diameter for the “pumpkin face.” Roll out the rest of the dough with a rolling pin. Line a greased pie dish with the rolled-out dough, pressing it firmly into the base and edges. Prick the bottom several times with a fork.
- Pour the pumpkin filling into the dish and smooth it out with a spatula. Place the pie on the middle rack of the oven and bake for 60–70 minutes.
- Roll out the reserved dough and cut out two eyes, a nose, and a mouth for the “pumpkin face.” It can help to sketch the face with a toothpick first (see step-by-step pictures).
- After the pie has baked for 45 minutes and the filling has firmed up slightly, carefully place the “pumpkin face” on top.
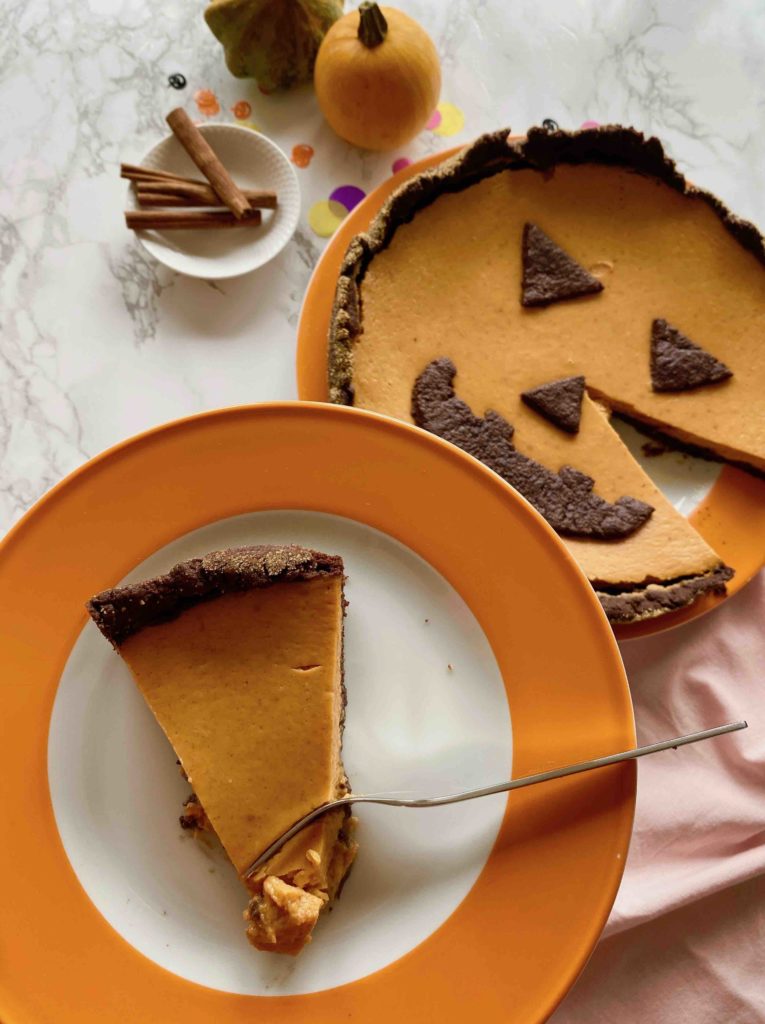
- When the baking time is over, remove the pie from the oven and let it cool in the dish on a rack for about 10 minutes. Then carefully remove it from the dish and allow it to cool completely on the rack.
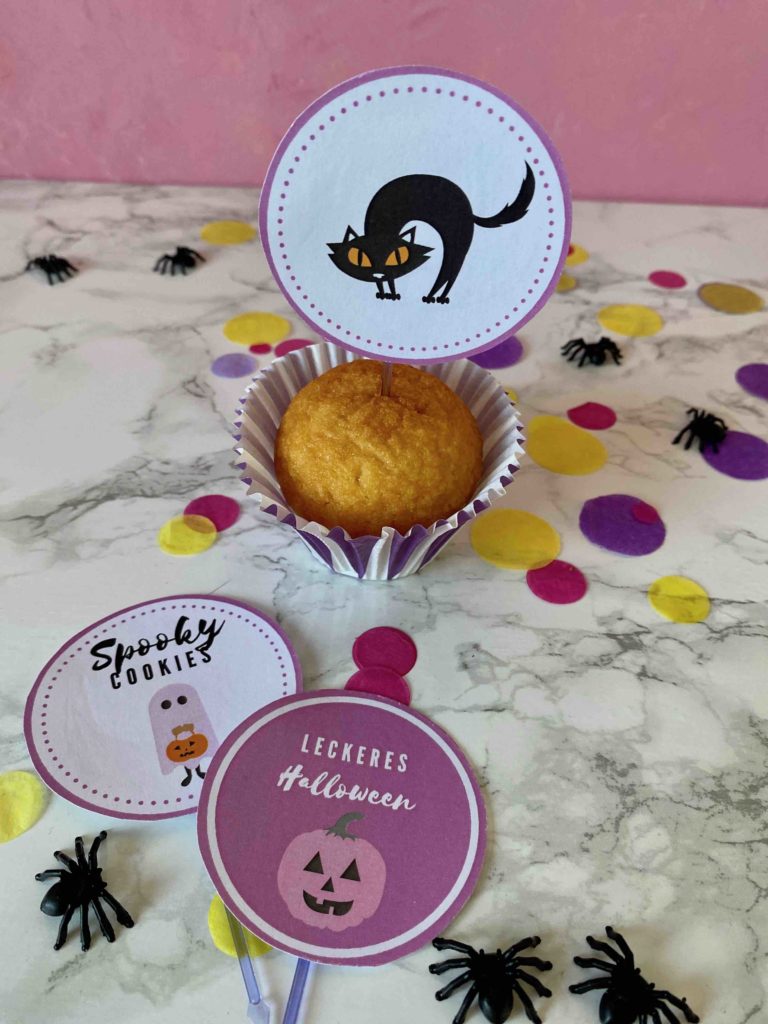
DIY muffin topper set
Do you already know our DIY gift tag set? With the cute gift tags for your DIY gifts from the kitchen, you can beautifully decorate your muffins. The muffin toppers are available as a colored print or for you to color in yourself!
Der Halloween-Kracher!
Preparation in pictures


If your minis and you enjoy our Halloween Pumpkin Pie as much as we do, we’d love for you to share your “pumpkin face” with us!
My minis and I wish your minis and you lots of fun baking — and even more fun celebrating Halloween!
Let’s get spooky!
Yours, Lia
Have you baked the recipe?
How exciting! We're really happy about that! We are pleased that we were able to delight you with our recipe. Feel free to share your treat with us on Instagram using the hashtag #backenmitminis.
BAKING NEWS – The most delicious thing right in your inbox?
Sign up for our newsletter and be the first to hear about colorful recipe ideas, easy baking hacks and upcoming baking promotions!