*This posting contains advertising.
Here, I’ll share my TOP 3 tips for stamped cookies! These will ensure your 3D Easter cookies turn out perfectly for your Easter brunch!
Baking cookies with kids is always a highlight—no matter the season, not just during the Christmas season! The moment I ask my little ones if they’d like to bake cookies, they excitedly rush to our baking cupboard to pick out their favorite cookie cutters*. Our beloved lemon bunny cookies are always a great choice.The most important thing is that the cookies, lovingly cut out, turn out both delicious and beautifully decorated! (Have you seen our blog post “Our Favorite Easter Cookies – Including 3 Decorating Ideas”?)
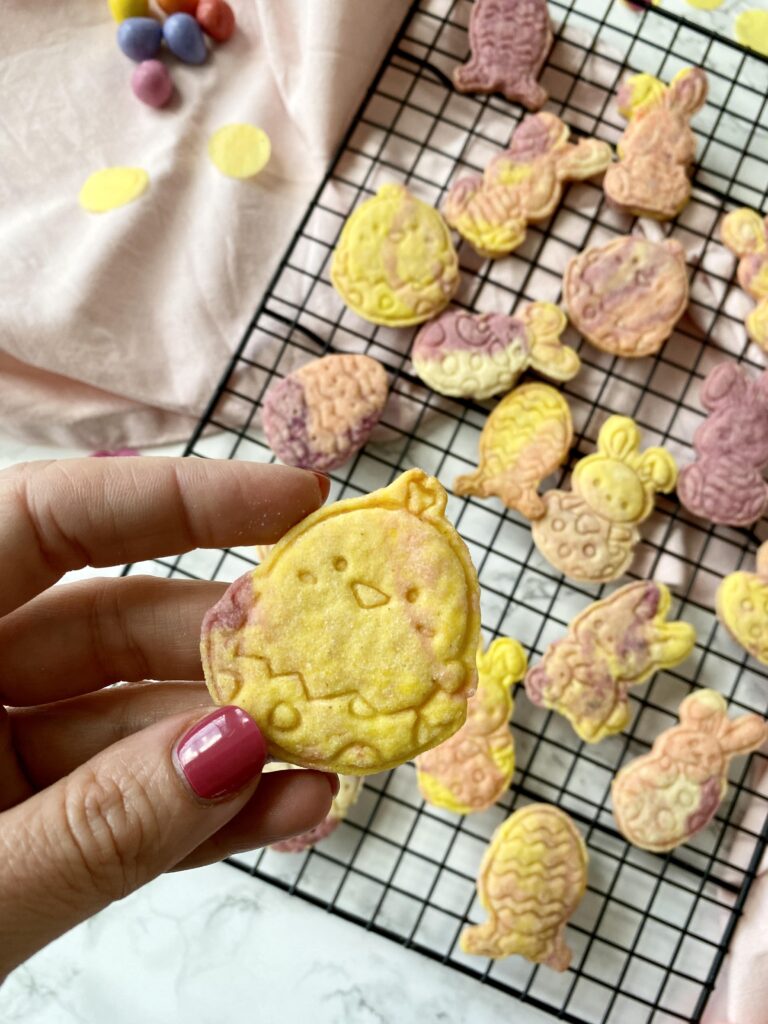
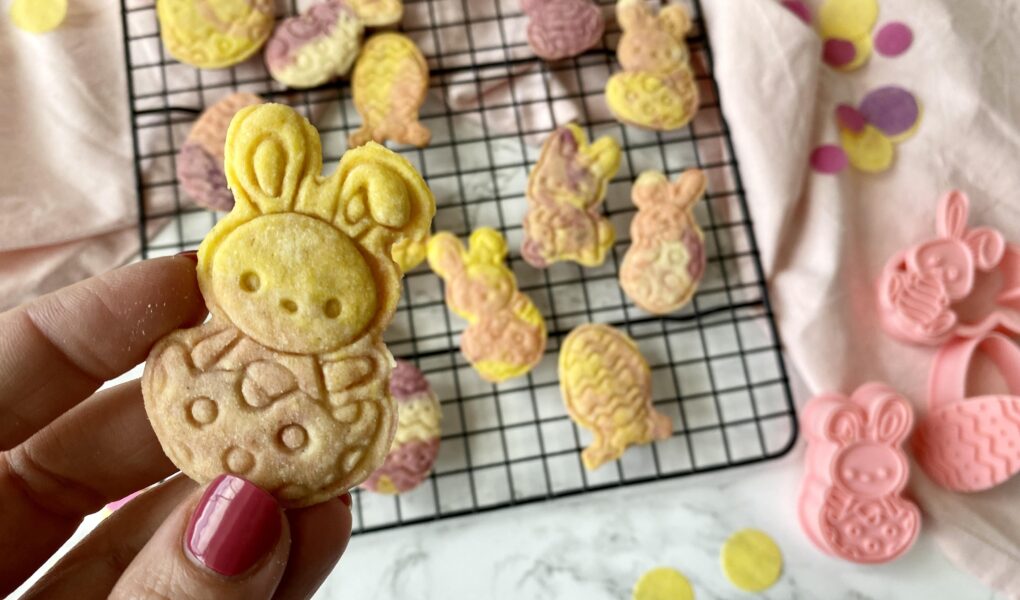
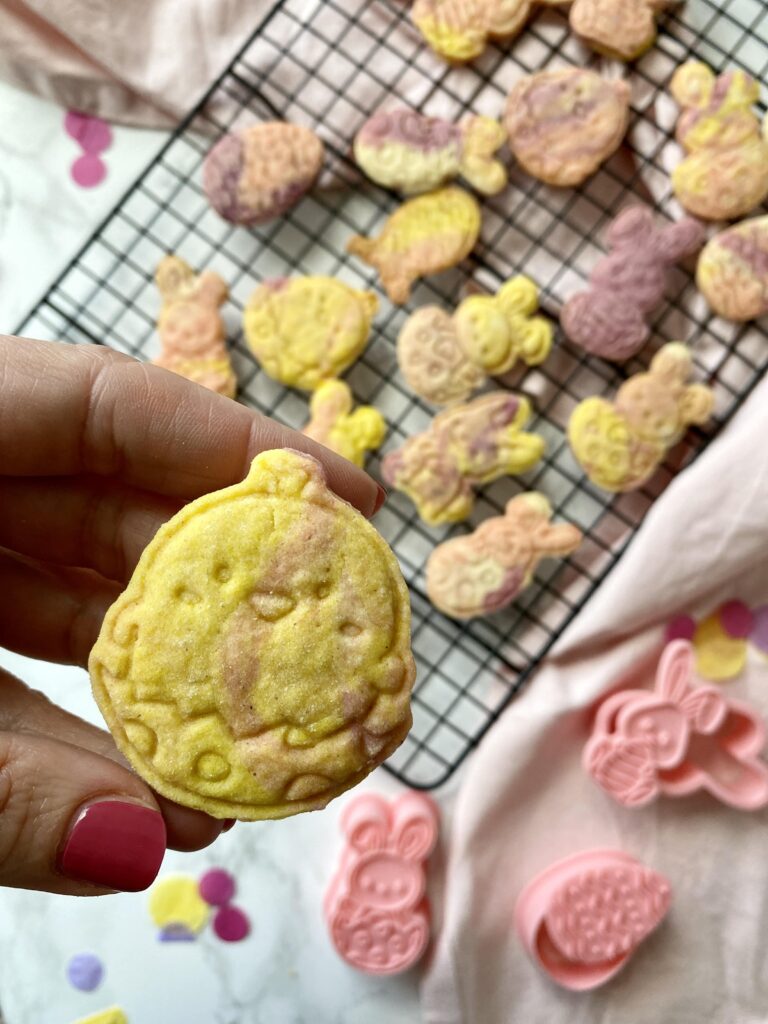
Today, we’re trying something new! We’re making stamped cookies using colorful cookie dough and skipping decorations like chocolate glaze, icing, or sugar pearls. This way, the designs of our colorful stamped cookies will really stand out…
Our 3 Tips for Stamped Cookies
My little ones and I love stamped cookies! With minimal effort, you can create beautiful designs using 3D cookie stamps and even personalize your cookies with names and greetings. To ensure that stamping the dough isn't frustrating and that the stamped designs remain just as beautiful after baking, we’ve put together our top tips for baking with cookie stamps:
- Avoid leavening agents in your dough: Baking soda and baking powder cause the dough to rise during baking. Unfortunately, this can blur the stamped edges, making the design unrecognizable after baking.
- Keep the dough as cold as possible: If you want sharp-edged cookies, the dough should be processed quickly and kept as cold as possible. This means letting the dough rest in the fridge for at least 30 minutes before rolling it out. The dough should not become too soft. To ensure the cookies stay cold before baking, I place the stamped cookies in the fridge for another 10–15 minutes before putting them in the preheated oven.
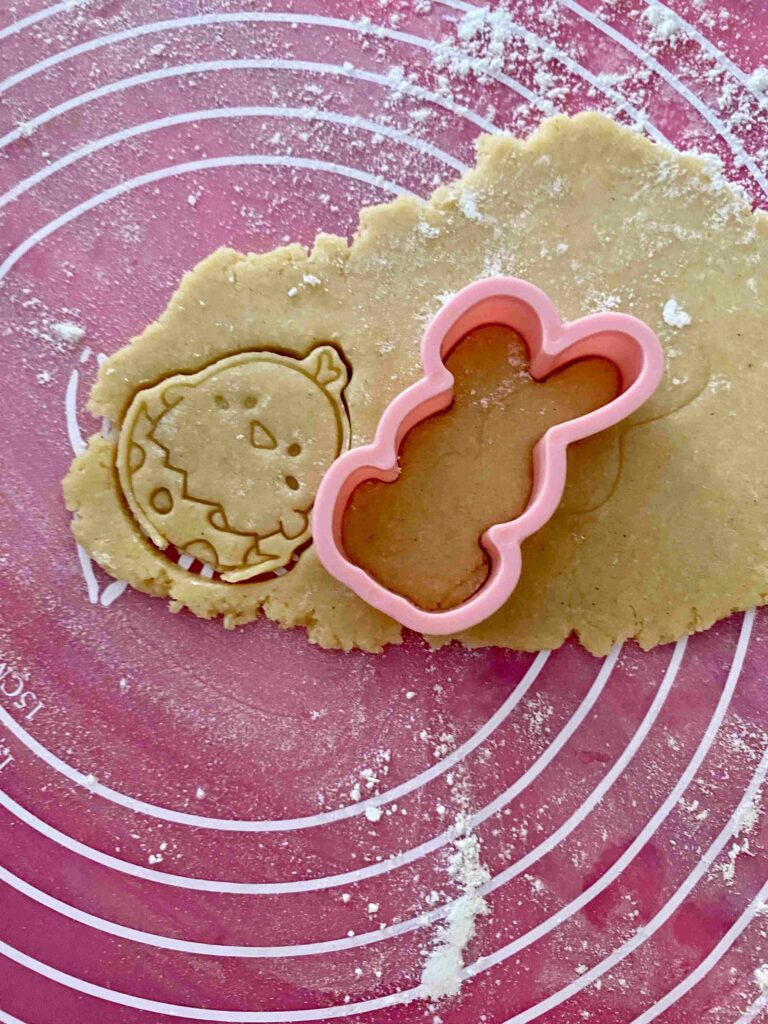
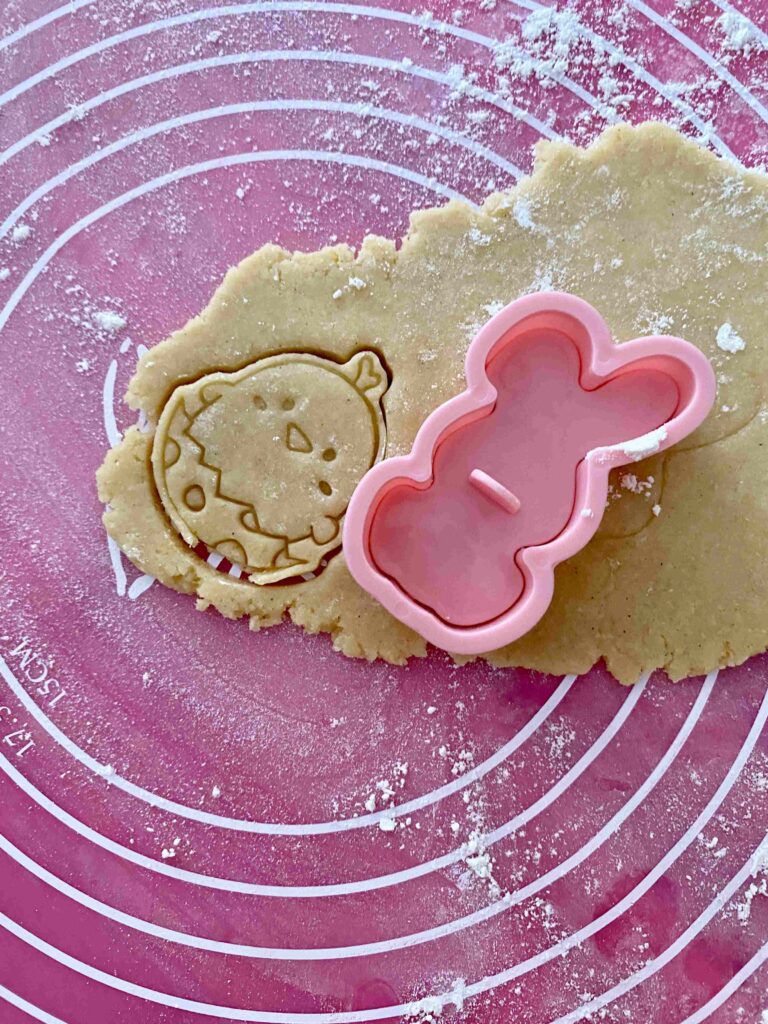
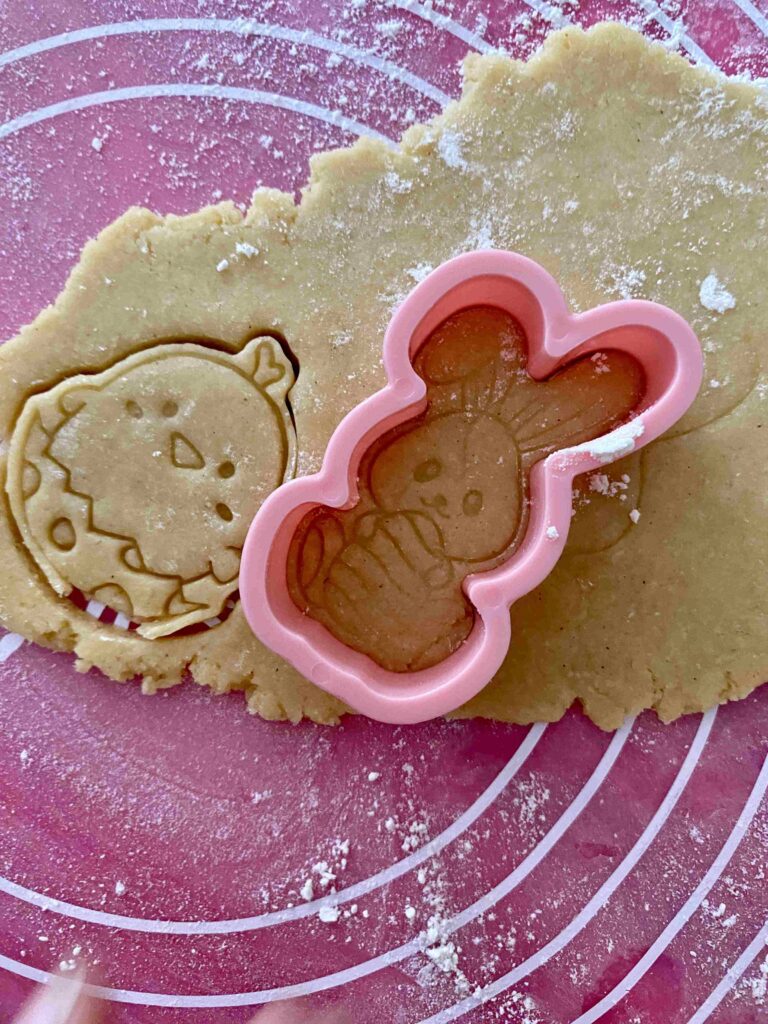
- Lightly dust the cookie stamp with flour: When stamping your cookies, lightly dust the stamp with flour to prevent the dough from sticking in the fine lines. This helps ensure the cookies release easily from the stamp and maintain their design.
With these three tips for stamped cookies and the following recipe for 3D Easter cookies, you and your little ones can bake beautiful stamped cookies for the Easter season!
Recipe for 3D Easter Cookies
This recipe is perfect for 3D stamped cookies and cut-out cookies. For the best results, make sure to work with the dough quickly and chill it for at least ten minutes before baking.
Ingredients for cookie dough
Ingredients for 40-50 3D Easter cookies
- 400 g flour
- 160 g sugar
- 1 pinch of salt
- 150 g soft butter
- 2 eggs
- yellow, red, purple food coloring (we use the food coloring from Goodbake*)
Discount code for your purchase at GoodBake: With the discount code “LIA12” you save 12% on your purchase from Goodbake.
Baking accessories
Kitchen scales, mixing bowl, disposable gloves, rolling pin, 3D cookie cutter (cookie stamp)*, baking tray with baking paper, rolling mat if necessary, blunt knife
The adorable 3D stamp cookie cutters we used for Easter can be found at TrueMo*. Plus, until April 20, 2025, you can get a one-time 20% discount on all products with the code MINIS20!
(*The links marked with an asterisk (*) are affiliate links. I can recommend suitable products that do not cost you more and I receive a small commission that helps me finance my blog. Thank you!)
Preparation
- Put all the ingredients for the cookie dough (except the food coloring) into a mixing bowl and knead them into a smooth dough.
- Then, divide the dough into four equal portions and color three of them in a spring-like shade, leaving one uncolored.
- Wrap each dough portion in plastic wrap and chill in the refrigerator for at least 30 minutes (see Tip No. 2 in our "3 Tips for Stamped Cookies").
- After the dough has chilled for 30 minutes, preheat the oven to 180°C (top/bottom heat).
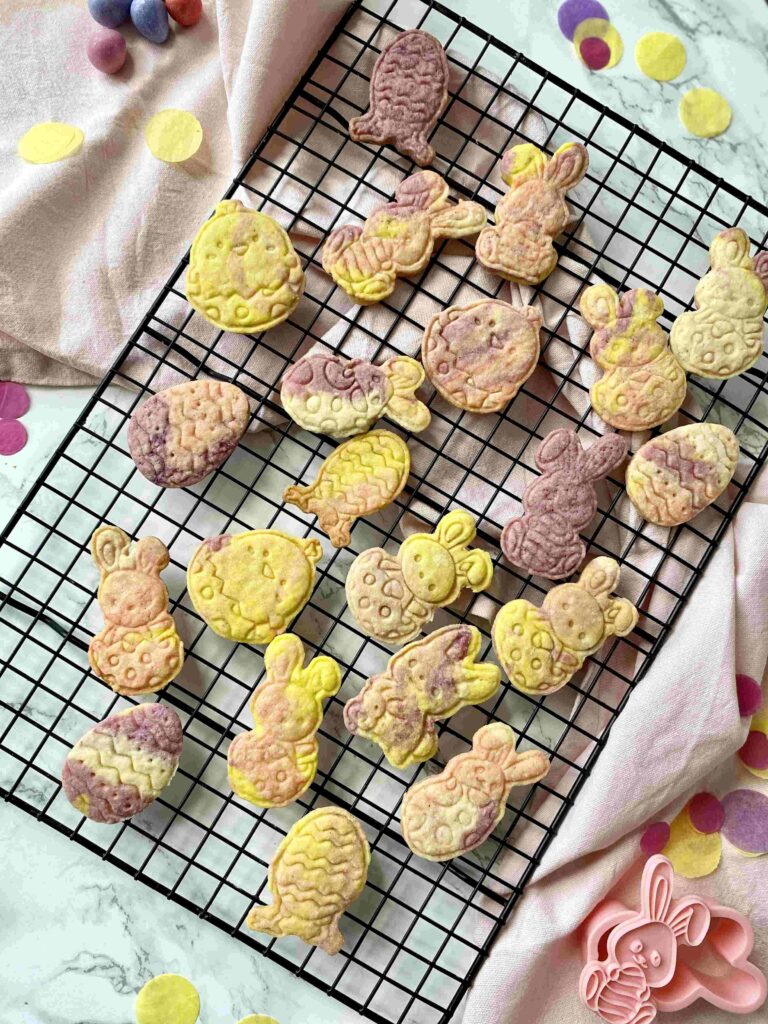
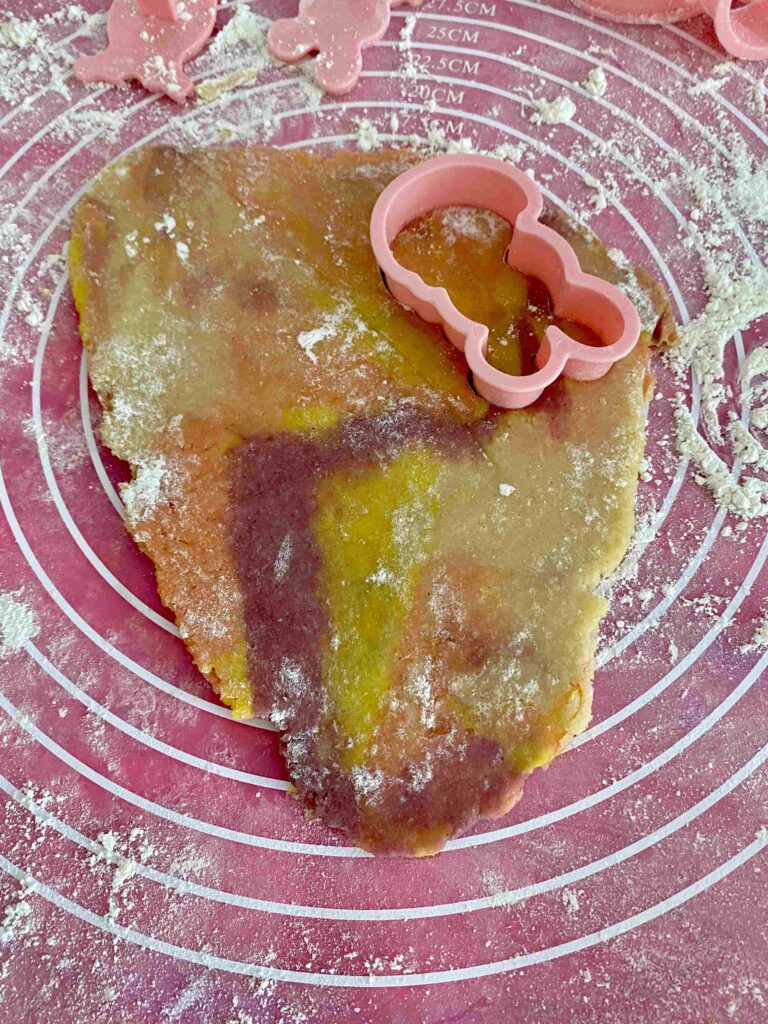
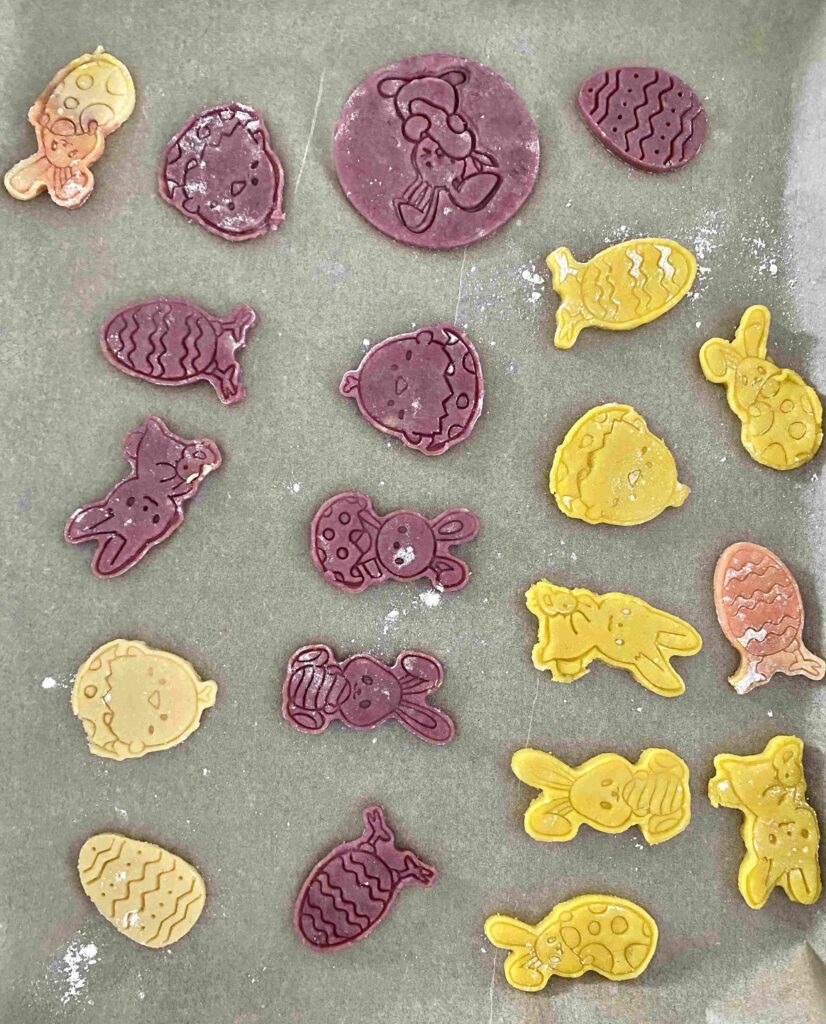
- Next, roughly knead the colorful dough portions together to create a marbled effect. To achieve a beautiful pattern, divide the colored dough balls into smaller pieces, mix them randomly, press them into a marbled ball, and roll it out on a floured surface with a rolling pin.
- Cut out the stamped cookies, press a lightly floured cookie stamp onto them (Tip No. 3 in our "3 Tips for Stamped Cookies"), and place them on a baking sheet lined with parchment paper.
- Once the baking sheet is full of stamped Easter cookies, bake them in the oven for 10-12 minutes. If the cookies become soft and slightly greasy before baking (due to melting butter), chill them for another 10-15 minutes before baking to keep the dough firm (remember Tip No. 2 in our "3 Tips for Stamped Cookies").
- After baking, let the stamped cookies cool on the baking sheet for 10 minutes before carefully transferring them to a cooling rack to cool completely.
And that’s it – our colorful and super cute 3D Easter cookies are ready!
Preparation in pictures


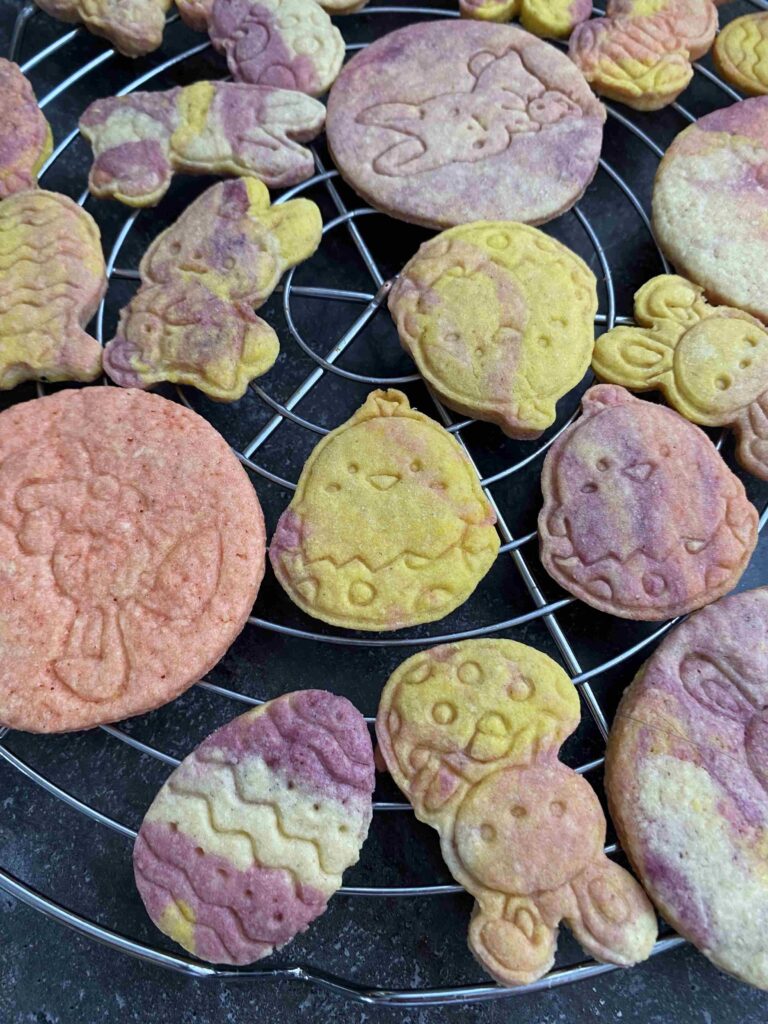
These Easter cookies are simply amazing! Thanks to the tips for stamped cookies, the designs remain crisp and clear even after baking. The food coloring stays beautifully vibrant, and the marbled effect looks especially pretty—no extra decoration needed! And it's not just me who loves these adorable cookie stamps—my little ones think they're absolutely "delicious-looking."
My kids and I wish you and your kids lots of fun baking and a wonderful Easter season!
Yours, Lia
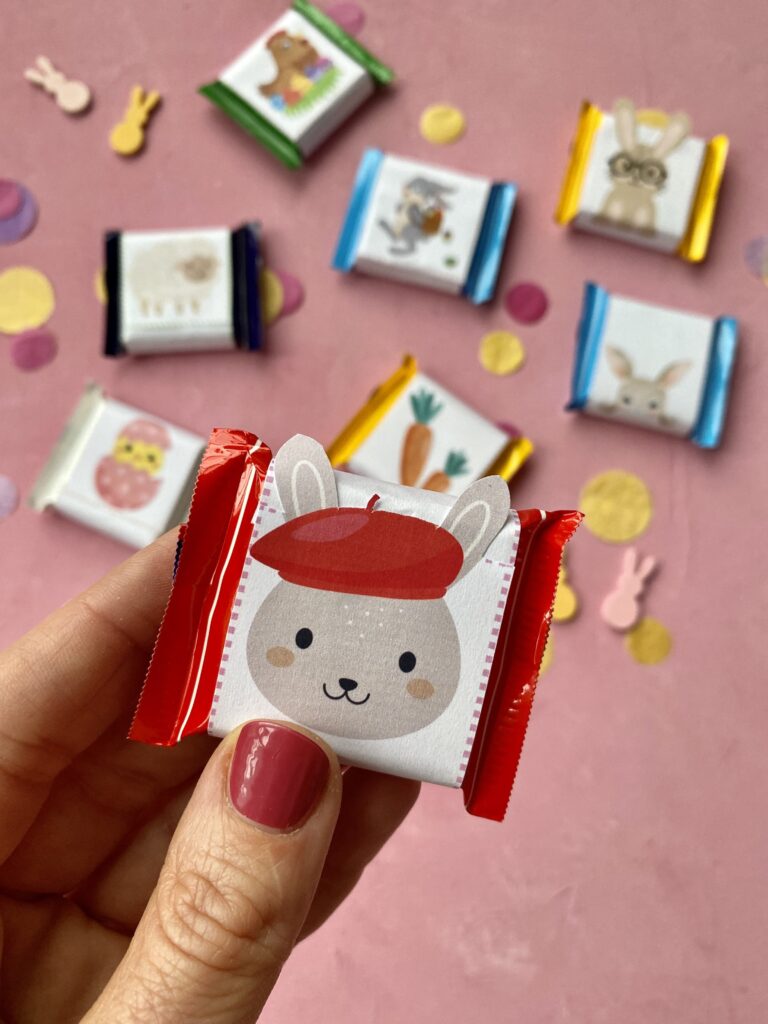
“Hoppy Easter greetings” – Chocolate Easter chocolates
Do you need a cute little something for your Easter mail? Or would you like to decorate your Easter table with chocolate treats this year?
Then these cute wrappers for your little Easter chocolates are just the thing! These creatively designed Easter chocolates fit perfectly in the mail and add that special something to any Easter nest!
Mini-Tip – Would you like to give away your delicacies as a lovely Easter gift? Then you will find great Easter gift tags, gift bags & labels for jars and cans to download in our shop.
Have you baked the recipe?
How exciting! We're really happy about that! We are pleased that we were able to delight you with our recipe. Feel free to share your treat with us on Instagram using the hashtag #backenmitminis.
BAKING NEWS – The most delicious thing right in your inbox?
Sign up for our newsletter and be the first to hear about colorful recipe ideas, easy baking hacks and upcoming baking promotions!
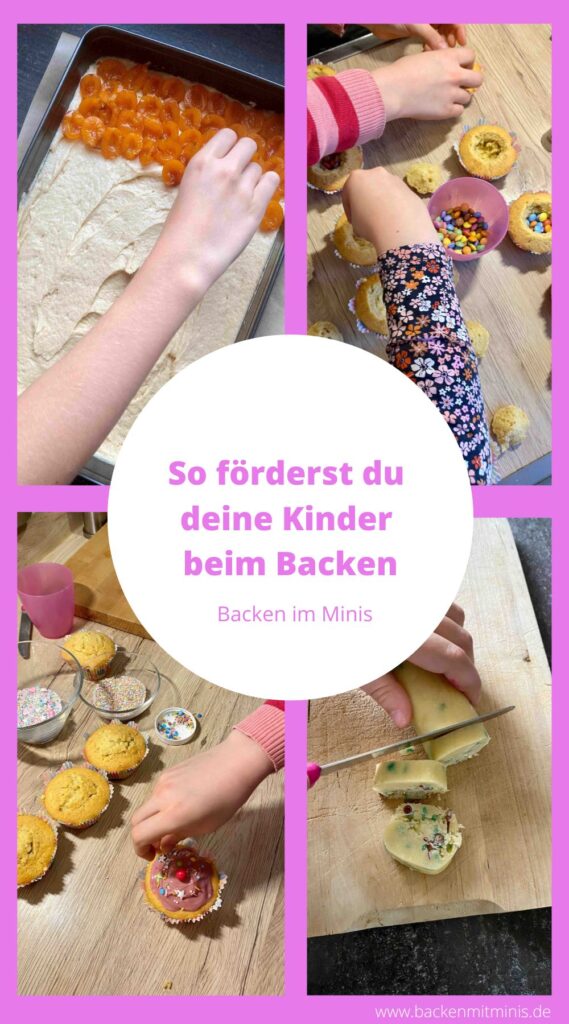
How to encourage your children to bake
Baking with children is much more than just a delicious treat that can be enjoyed together!
By baking with your child, you'll teach them many valuable things! Learn more about this in my blog post: How to encourage your children to bake!
To make baking a wonderful, shared experience for you and your little ones, you'll find tips for stress-free baking in the following blog posts:
- My tips for baking with children
- Baking tasks for children aged 2 and over
- Safety when baking with children
- Q & A about baking
Have fun baking! Yours Lia!